Sunday, January 19, 2025

Simple and stylish loft shed designs for beginners

Simple and Stylish Loft Shed Designs for Beginners

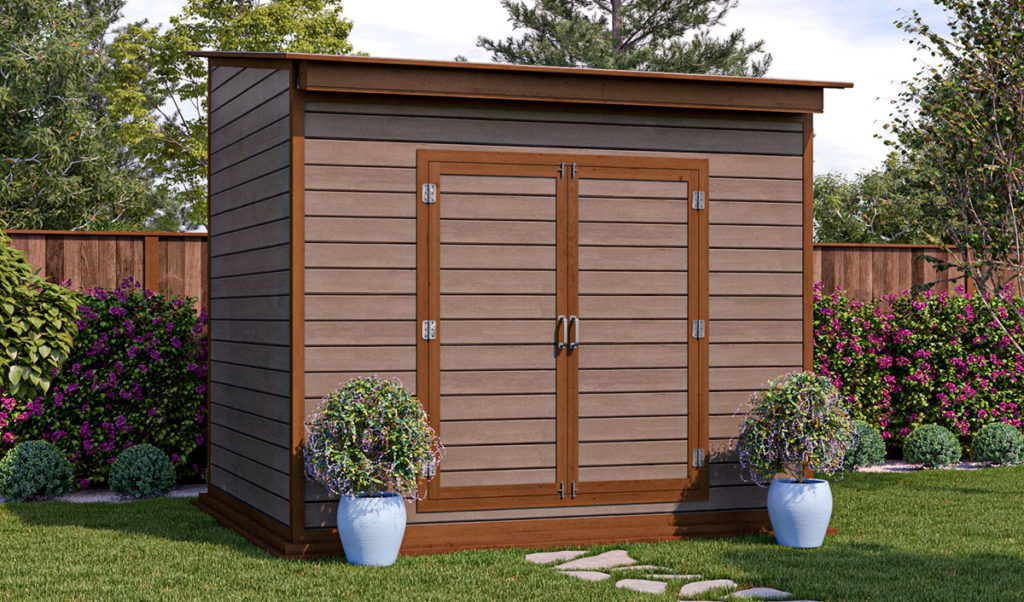
The allure of a well-designed shed extends beyond mere storage. A thoughtfully constructed structure, particularly one incorporating a loft, can significantly enhance the functionality and aesthetic appeal of any property. This article delves into the realm of simple and stylish loft shed designs, providing comprehensive guidance for beginners eager to embark on this rewarding project.

Understanding the Basics of Loft Shed Construction

Before diving into specific designs, it's crucial to grasp the fundamental principles of loft shed construction. This understanding will facilitate informed decision-making and ensure a successful outcome. The foundation of any successful shed build rests on meticulous planning and preparation.

Site Selection and Preparation

The ideal location for your loft shed should consider factors such as sunlight exposure, proximity to power sources (if needed), access for delivery and construction, and adherence to local building regulations. Proper site preparation involves clearing the area of vegetation, leveling the ground, and ensuring adequate drainage to prevent water damage.

Foundation Considerations

A stable foundation is paramount. Options range from a simple gravel base for lighter sheds to more robust concrete slabs for heavier structures. The chosen foundation type should be commensurate with the overall weight of the shed and the soil conditions. Consult local building codes to determine the appropriate foundation requirements for your area.

Material Selection

The choice of materials significantly impacts the aesthetics and durability of your loft shed. Common materials include pressure-treated lumber for framing, plywood for sheathing, and various roofing options such as asphalt shingles, metal roofing, or even recycled materials for a more sustainable approach. Consider factors such as budget, maintenance requirements, and desired aesthetic when making your selections.

Simple and Stylish Loft Shed Designs: A Comprehensive Overview

The following sections outline several simple yet stylish loft shed designs, each catering to different needs and preferences. These designs prioritize ease of construction for beginners while emphasizing aesthetic appeal.

The Classic A-Frame Loft Shed

The A-frame design is a timeless classic known for its simplicity and strength. Its characteristic triangular shape is both aesthetically pleasing and structurally efficient. This design allows for ample loft space, ideal for storage or even a small workspace. Construction involves straightforward framing techniques, making it an excellent choice for beginners. Consider adding a gable window to enhance natural light and ventilation.

Key features:

  • Simple framing
  • Ample loft space
  • Aesthetically pleasing design
  • Relatively easy construction

The Gambrel Roof Loft Shed

The gambrel roof, characterized by its double slope, offers increased headroom in the loft area compared to the A-frame design. This provides a more comfortable and spacious loft, suitable for a variety of uses. While slightly more complex than the A-frame, the gambrel roof remains relatively accessible for beginner builders. The additional roof space also increases storage capacity.

Key features:

  • Increased loft headroom
  • Greater storage capacity
  • Elegant and traditional aesthetic
  • Moderate construction complexity

The Shed with a Lean-To Loft

This design involves adding a lean-to structure to an existing shed, creating a simple loft area. This is an ideal option for those who already have a shed but desire additional storage space. It’s a cost-effective solution, requiring less material than building a completely new structure. The lean-to design can easily be customized to suit existing shed dimensions.

Key features:

  • Cost-effective solution
  • Simple construction
  • Ideal for adding loft space to an existing shed
  • Easily customizable

Essential Considerations for Beginners

Embarking on a loft shed project requires careful consideration of several crucial factors:

Building Permits and Regulations

Always check with your local authorities regarding building permits and regulations. These requirements vary by location and may influence design choices and construction methods. Failure to obtain necessary permits can lead to penalties and potential demolition.

Safety Precautions

Safety should be paramount throughout the construction process. Always wear appropriate personal protective equipment (PPE), including safety glasses, gloves, and hearing protection. Use proper lifting techniques to avoid injuries. Ensure that the structure is adequately secured and stabilized during construction.

Budgeting and Cost Estimation

Develop a detailed budget that includes all materials, tools, and potential labor costs. Factor in unforeseen expenses and maintain a contingency fund. Research material prices and compare options to optimize your budget.

Seeking Professional Assistance

Don't hesitate to seek professional advice or assistance if needed. Consult with experienced builders, architects, or contractors for guidance on design, construction techniques, and regulatory compliance. This can significantly enhance the chances of a successful and safe project.

Conclusion

Constructing a simple and stylish loft shed is a rewarding project for beginners. Careful planning, meticulous execution, and attention to detail are essential for achieving a successful outcome. By following the guidelines outlined in this article and prioritizing safety, you can create a valuable addition to your property, enhancing its functionality and aesthetic appeal for years to come.

Read More..

DIY shed construction made easy

DIY Shed Construction: A Comprehensive Guide to Effortless Erection

Constructing a shed can seem daunting, a project best left to seasoned professionals. However, with meticulous planning and a methodical approach, building your own shed becomes a manageable and rewarding endeavor. This comprehensive guide provides a detailed walkthrough of the entire process, from initial design considerations to the final finishing touches, ensuring a smooth and successful DIY shed construction project.

Phase 1: Planning and Preparation â€" Laying the Foundation for Success

Before even purchasing a single piece of lumber, thorough planning is paramount. This phase sets the stage for a successful build and minimizes potential setbacks later in the project.

Defining Your Shed's Purpose and Dimensions

The first step involves clearly defining the intended purpose of your shed. Will it serve as a storage unit for gardening tools, a workshop for DIY projects, or a combination of both? This directly influences the required size and internal layout. Accurate measurements are critical. Consider not only the desired internal space but also the external dimensions, ensuring sufficient room for doors, windows, and overall functionality. Sketch a detailed floor plan, noting the positions of shelving, workbenches, and other internal features. Accurate planning at this stage prevents costly mistakes during construction.

Site Selection and Ground Preparation

Choosing the right location is crucial. Assess your property for factors like sunlight, access, proximity to utilities, and drainage. A level surface is essential for a stable shed foundation. Clear the chosen site of any vegetation, debris, and rocks. If the ground is uneven, you may need to level it using topsoil or compacted gravel. Consult local building codes and regulations to ensure your chosen location complies with all relevant requirements.

Obtaining Necessary Permits and Materials

Depending on your location and the size of your shed, you may need to obtain building permits. Contact your local council or building authority to inquire about permit requirements and any necessary approvals. Once permits are secured, create a comprehensive materials list. Accurately estimate the quantity of lumber, fasteners, roofing materials, and other components required. This minimizes trips to the hardware store and ensures a continuous workflow.

Phase 2: Foundation Construction â€" Building a Solid Base

A robust foundation is the cornerstone of any successful shed construction project. The choice of foundation depends on factors such as soil type, shed size, and local regulations.

Concrete Slab Foundation

A concrete slab provides a durable and level base, ideal for larger and heavier sheds. This involves excavating the site to the required depth, constructing a formwork, and pouring a reinforced concrete slab. Allow sufficient curing time for the concrete to reach its full strength before proceeding with the shed construction.

Gravel Base Foundation

For smaller sheds on well-drained soil, a gravel base offers a simpler and more cost-effective alternative. This involves excavating the site, compacting the soil, and laying a layer of compacted gravel. A level base is crucial to ensure stability. This method is suitable for lighter sheds and requires less specialized equipment.

Wooden Skids or Sleepers

Wooden skids or sleepers provide a basic foundation, primarily suited for lightweight sheds on relatively level ground. This involves placing pressure-treated lumber directly on the ground, creating a raised base for the shed. This method offers a quick and easy solution but may not provide the same level of stability and durability as concrete or gravel bases. Regular inspection and maintenance are essential to prevent rot or damage.

Phase 3: Framing and Wall Construction â€" Erection of the Shed Structure

With the foundation completed, focus shifts to the framing and construction of the shed’s walls. Accuracy and precision are paramount to ensure structural integrity.

Framing the Floor

Begin by constructing the floor frame, using pressure-treated lumber to resist rot and decay. Ensure the frame is level and square, using a level and measuring tape to verify dimensions. Secure the frame to the foundation using appropriate fasteners.

Wall Framing

Construct the wall frames using pressure-treated lumber for the base plates and studs. Ensure the wall frames are plumb and square. Use appropriate bracing to maintain structural integrity during construction. Carefully measure and cut lumber to the required lengths, ensuring accurate alignment.

Raising and Securing the Walls

Carefully raise and secure the wall frames onto the floor frame. Use temporary bracing to maintain stability while securing the walls to the floor frame with appropriate fasteners. Ensure the walls are plumb and aligned before permanently securing them.

Phase 4: Roofing and Cladding â€" Completing the Exterior Shell

Once the walls are erected, the roofing and cladding are installed to complete the shed’s exterior shell, providing protection from the elements.

Roof Framing and Installation

Construct the roof frame according to the chosen roof design (e.g., gable, shed). Ensure the roof frame is properly aligned and braced. Install the roofing material, ensuring proper overlap and sealing to prevent leaks. Adhere to manufacturer’s instructions for specific roofing material.

Wall Cladding

Install the chosen wall cladding (e.g., shiplap, siding, plywood). Ensure proper alignment and secure the cladding with appropriate fasteners. Use weatherproofing sealant where necessary to prevent water ingress.

Door and Window Installation

Install the doors and windows, ensuring proper alignment and sealing. Use appropriate weatherstripping to prevent drafts and water ingress. Follow manufacturer's instructions for specific installation details.

Phase 5: Interior Finishing and Final Touches â€" Creating a Functional Space

The final phase focuses on interior finishing, transforming the basic shed structure into a functional and usable space.

Interior Wall Finishing

Finish the interior walls with drywall, paneling, or other suitable material. Ensure surfaces are smooth and even. Paint or apply a suitable finish to enhance aesthetics and durability.

Flooring Installation

Install the chosen flooring material. This could include concrete, plywood, vinyl, or other suitable options. Ensure the flooring is level and securely fastened.

Shelving and Storage Solutions

Install shelving and other storage solutions to maximize the shed’s utility and organization. This could involve building custom shelves or purchasing pre-made units.

Electrical and Lighting

If required, install electrical wiring and lighting. Ensure all electrical work is carried out according to local regulations and safety standards. Consider the use of GFCI outlets for added safety.

Building your own shed is a rewarding experience. By following this detailed guide and maintaining a methodical approach, you can successfully construct a functional and durable shed tailored to your specific needs. Remember safety is paramount; always use appropriate safety equipment and follow all manufacturer’s instructions.

Read More..

Friday, November 22, 2024

Create the Ultimate Backyard Storage with a Wood Pallet Shed

Create the Ultimate Backyard Storage with a Wood Pallet Shed

The Ultimate Backyard Storage Solution: Constructing a Durable and Aesthetically Pleasing Wood Pallet Shed

The desire for efficient and attractive backyard storage is a common aspiration among homeowners. While pre-fabricated sheds offer convenience, constructing a shed from reclaimed wood pallets provides a unique opportunity to create a customized, cost-effective, and environmentally conscious storage solution. This comprehensive guide will detail the process of building an ultimate backyard storage shed utilizing repurposed wood pallets, emphasizing durability, aesthetics, and functionality.

I. Planning and Preparation: Laying the Foundation for Success

Before embarking on the construction process, meticulous planning and preparation are crucial for a successful outcome. This phase involves several key steps that will significantly impact the project's overall quality and longevity.

A. Site Selection and Assessment

Choosing the ideal location for your pallet shed is paramount. Consider factors such as:

  • Accessibility: Ensure easy access for loading and unloading items.
  • Sunlight and Shade: Balance sun exposure for natural light with sufficient shade to prevent excessive heat buildup.
  • Drainage: Select a site with good drainage to prevent water accumulation and potential rot.
  • Ground Conditions: Assess the ground's stability and consider the need for leveling or foundation preparation.
  • Local Regulations: Check with local authorities regarding building permits and zoning regulations.

B. Pallet Sourcing and Inspection

The quality of the pallets will directly impact the shed's structural integrity. Prioritize pallets that are:

  • Heat-treated (HT): These are safer and less likely to harbor pests.
  • Structurally Sound: Inspect for rot, damage, or loose nails.
  • Consistent Size and Type: Opt for pallets of similar dimensions for easier construction.
  • Clean and Free of Debris: Thoroughly clean the pallets before use.

Consider sourcing pallets from local businesses or recycling centers, ensuring ethical and environmentally responsible procurement.

C. Design and Dimensions

Develop a detailed design plan, including the shed's overall dimensions, door placement, window placement (if desired), and roof style. Consider the amount of storage space needed and the size of the items to be stored. Sketching a design and creating a scaled drawing will greatly aid in the construction process. Factor in the dimensions of the pallets you've sourced to optimize material usage and minimize waste.

II. Construction: Building the Pallet Shed Frame

With the planning complete, the construction phase begins, focusing on building a robust and stable frame.

A. Foundation Preparation

Prepare a level foundation, whether it's a concrete slab, compacted gravel base, or a simple wooden platform. The chosen foundation must be capable of supporting the weight of the completed shed and its contents. Ensure the foundation is appropriately sized to accommodate the shed's dimensions.

B. Frame Assembly

Construct the frame using sturdy pallets, potentially reinforcing them with additional lumber for increased strength. Use galvanized screws or strong nails for fastening. The frame should be square and plumb, ensuring a stable structure. Pay attention to details such as corner bracing and appropriate spacing for walls and roof supports.

C. Wall Construction

Attach the pallets to the frame to create the walls. Ensure proper alignment and secure fastening. You may need to cut or adjust some pallets to fit perfectly. Consider adding extra bracing to strengthen the walls, particularly in areas subjected to high winds or stress.

D. Roof Construction

Construct the roof frame using additional lumber, ensuring it is appropriately sized and angled for adequate water runoff. The roof can be constructed using more pallets, providing a rustic aesthetic. Alternatively, consider using plywood or other roofing materials for a more weatherproof finish. Proper waterproofing is crucial to protect the shed's contents from the elements.

III. Finishing Touches: Enhancing Functionality and Aesthetics

Once the basic structure is complete, attention should turn to enhancing the shed's functionality and aesthetics.

A. Door and Window Installation

Install a sturdy door, ensuring a secure closure. Consider adding a lock for increased security. If windows are included in the design, install them carefully, ensuring weatherproofing to prevent drafts and water ingress. Choose appropriately sized and durable materials for both the doors and windows.

B. Exterior Finishing

Apply a weather-resistant sealant or stain to protect the wood from the elements. This will significantly prolong the shed's lifespan and enhance its aesthetic appeal. Choosing a color that complements the surrounding landscape will further improve the overall look.

C. Interior Finishing

Consider adding shelves or other internal storage solutions to maximize the shed's usable space. Painting the interior walls can enhance the aesthetic appeal and provide a more welcoming storage space. Remember to use paints appropriate for wooden surfaces.

IV. Maintenance and Longevity: Preserving Your Investment

Proper maintenance is essential for ensuring the longevity of your pallet shed. Regular inspections, timely repairs, and proactive measures will significantly extend its useful life.

Regularly inspect the shed for any signs of damage, such as rotting wood, loose nails, or pest infestations. Address these issues promptly to prevent further deterioration. Periodically reapply a weather-resistant sealant or stain to protect the wood from the elements. Keep the shed clean and dry to prevent mold and mildew growth. By following these guidelines, your pallet shed will provide years of reliable and attractive storage.

Constructing a backyard shed from reclaimed wood pallets offers a unique blend of cost-effectiveness, environmental responsibility, and aesthetic appeal. By carefully following the planning, construction, and maintenance guidelines outlined in this comprehensive guide, you can create an ultimate backyard storage solution that meets your specific needs and enhances the overall beauty of your outdoor space. Remember, attention to detail throughout the process is crucial for achieving a durable and aesthetically pleasing result.

Read More..

How to Build a Lean-To Shed: Quick Instructions for Building Your Shed

How to Build a Lean-To Shed: Quick Instructions for Building Your Shed

Building Your Lean-To Shed: A Quick Guide

Dreaming of extra storage space without the hefty price tag of a full shed? A lean-to shed is the perfect solution! This simple structure, attached to an existing wall, offers practical storage with a surprisingly straightforward build. Follow these steps, and you'll be enjoying your new lean-to in no time.

Planning Your Lean-To Shed

Before you grab your tools, careful planning is crucial. First, determine the ideal location and size for your lean-to. Consider proximity to existing structures for easy access and utility connections. Measure the length of the wall you'll attach the shed to, ensuring your lean-to's dimensions complement the existing building. Decide on the desired height and depth, sketching a simple design to visualize your project. Remember to check local building codes and obtain necessary permits before starting construction. This preparation minimizes potential setbacks and ensures a smooth building process.

Gathering Your Materials

Next, create a comprehensive materials list. You'll need pressure-treated lumber for the frame, offering durability against the elements. Consider using 4x4 posts for the base, 2x4s for the framing, and plywood or metal roofing for the roof and walls. Don't forget fasteners like screws, nails, and anchors, as well as weatherproof sealant to protect your shed from moisture. A level, tape measure, saw (circular saw is recommended), and a drill are essential tools. Acquire all materials upfront to avoid project delays. A detailed list, checked against your design, will prevent costly trips back to the hardware store.

Constructing the Frame

Begin by preparing the foundation. For a simple lean-to, a concrete slab or a compacted gravel base will suffice. Attach pressure-treated 4x4 posts to this base, creating the vertical supports for your shed's back wall. Make sure these posts are plumb and level, using a level to ensure they are perfectly vertical. Next, attach the horizontal 2x4 beams to the posts and the existing building, creating a sturdy frame. This forms the base structure of your lean-to. Ensure all connections are strong and secure using appropriate fasteners.

Building the Roof

With the frame complete, you'll now construct the roof. Cut and attach rafters to the top of the frame, ensuring proper slope for water runoff. Fasten plywood or metal roofing sheets to the rafters, overlapping edges to create a watertight seal. Consider adding roofing felt or tar paper under the roofing sheets for extra protection. Secure the roofing material with appropriate fasteners, remembering to install any necessary vents or flashing. A properly constructed roof will keep your shed’s contents safe and dry for years to come.

Finishing Touches

Once the roof is secure, you can add the walls. Use plywood sheets or other suitable material, attaching them to the frame. Consider adding a door for easy access to the storage area. Finish by applying a weatherproof sealant to all joints and exposed wood surfaces to protect against moisture damage and extend the life of your shed. A final coat of paint or stain can add a personal touch and enhance the aesthetic appeal of your new lean-to shed.

Congratulations! You've successfully built your own lean-to shed. Enjoy your newly acquired storage space. Remember to regularly inspect your shed for any signs of damage and perform necessary maintenance to ensure it remains in good condition.

Read More..

Thursday, November 21, 2024

Wood Pallet Shed Build: Turn Old Pallets into a Gorgeous Backyard Shed

Wood Pallet Shed Build: Turn Old Pallets into a Gorgeous Backyard Shed

Wood Pallet Shed Build: Turn Old Pallets into a Gorgeous Backyard Shed

Tired of cluttered garages and overflowing storage spaces? Yearning for a charming, rustic addition to your backyard? Then consider transforming discarded wood pallets into a beautiful and functional shed! This project, while requiring some elbow grease, offers a rewarding experience and a unique, eco-friendly structure you'll be proud to showcase. This guide provides a step-by-step process, empowering you to build your own gorgeous pallet shed.

Planning Your Pallet Shed

Before you dive into construction, careful planning is key. First, determine the size and purpose of your shed. Will it house gardening tools, bicycles, or serve as a small workshop? The dimensions will dictate the number of pallets you'll need. Next, source your pallets. Look for sturdy pallets made of pressure-treated lumber (ensure it's safe for outdoor use) and inspect them for rot, damage, and loose nails. Cleaning and prepping the pallets is crucial. Remove any loose nails, debris, and stamps using a hammer, crowbar, and wire brush. Consider sanding for a smoother finish. Finally, sketch a design. Simple designs are easiest for beginners; consider a basic rectangular structure or explore more complex designs with gables or dormers once you're more confident.

Gathering Materials and Tools

Once your design is finalized, gather your materials and tools. You'll need a substantial number of pallets based on your shed's size. In addition to the pallets, acquire these essential items:

  • Foundation materials: Concrete blocks, gravel, or a wooden frame, depending on your preferred base.
  • Fasteners: Galvanized nails, screws, and possibly metal brackets for added strength.
  • Roofing materials: Shingles, corrugated metal, or tar paper, along with roofing nails.
  • Optional additions: Exterior paint or sealant for weather protection, hinges and a latch for the door, and windows for ventilation and light.

Essential tools include a hammer, saw (circular saw recommended), drill, level, measuring tape, safety glasses, and work gloves.

Construction Steps: Building Your Pallet Shed

Foundation and Base

Begin by preparing a level foundation. Whether you opt for concrete blocks, gravel, or a wooden frame, ensure a solid, stable base to prevent settling. This step is crucial for the longevity of your shed.

Wall Construction

Carefully assemble the pallet walls. Position and secure the pallets vertically, ensuring they're level and aligned. Use galvanized nails or screws to create robust connections between the pallets. Strengthen the structure by adding cross bracing where needed. Remember to leave openings for doors and windows.

Roof Construction

Construct the roof frame using additional lumber or repurposed pallets, creating a sturdy support structure for your chosen roofing material. Ensure the roof has adequate slope to prevent water accumulation. Attach your roofing material securely, paying attention to overlapping for weather resistance.

Finishing Touches

Once the main structure is complete, add the finishing touches. Install the door and hinges, add any windows, and apply exterior paint or sealant for protection against the elements. Consider adding a personal touch with decorative elements or landscaping around the shed.

Safety First

Safety should be your top priority throughout the entire process. Always wear appropriate safety gear, including safety glasses and work gloves. Be cautious when handling power tools and ensure the work area is well-lit and free of obstacles. If you're unsure about any aspect of the construction, seek professional advice.

Building a pallet shed is a rewarding project that combines creativity, resourcefulness, and practical skills. With careful planning and execution, you can create a beautiful and functional addition to your backyard that you’ll enjoy for years to come.

Read More..

Craft a Lean-To Shed That Enhances Your Outdoor Living Space

Craft a Lean-To Shed That Enhances Your Outdoor Living Space

Crafting a Lean-To Shed: An Enhancement to Outdoor Living Spaces

The lean-to shed, a deceptively simple structure, offers a remarkable opportunity to expand and enrich outdoor living spaces. Its inherent adaptability allows for a wide range of functionalities, from a practical storage solution to an elegant extension of the home's aesthetic. This comprehensive guide details the planning, construction, and finishing processes involved in creating a lean-to shed that seamlessly integrates with your existing landscape and enhances your enjoyment of the outdoors.

Phase 1: Planning and Design Considerations

The success of any construction project hinges on meticulous planning. Before commencing work on your lean-to shed, several crucial aspects require careful consideration.

1.1 Site Selection and Orientation

The chosen location profoundly impacts the shed's functionality and aesthetic appeal. Consider factors such as:

  • Proximity to existing structures: Ensure sufficient clearance for access and to avoid obstructing views or pathways.
  • Sunlight exposure: Optimize natural light penetration for intended uses. A south-facing orientation (in the northern hemisphere) maximizes solar gain.
  • Drainage: Select a site with good drainage to prevent water accumulation and potential structural damage. Avoid low-lying areas prone to flooding.
  • Accessibility: Ensure easy access for materials delivery during construction and future use of the shed.

1.2 Dimensions and Functionality

Determine the appropriate dimensions based on the intended use. A small lean-to might suffice for storing gardening tools, while a larger structure could serve as a workshop or outdoor dining area. Carefully consider:

  • Length and width: These dimensions directly impact storage capacity or usable space.
  • Height: Sufficient headroom is crucial for comfortable use and movement within the shed.
  • Door placement and size: Ensure easy access for equipment and materials. Consider double doors for larger items.
  • Window placement: Strategic window placement enhances natural light and ventilation.

1.3 Building Codes and Permits

Familiarize yourself with local building codes and zoning regulations before commencing construction. In many jurisdictions, permits are required for structures exceeding specific size limits or involving certain construction materials. Obtaining the necessary permits ensures compliance and avoids potential legal issues.

Phase 2: Materials and Construction

The selection of appropriate materials significantly impacts the shed's durability, aesthetic appeal, and overall cost. A balanced approach considering both practicality and longevity is crucial.

2.1 Foundation

A robust foundation is paramount for structural integrity. Options include:

  • Concrete slab: Provides a durable and level base, ideal for heavier structures.
  • Gravel base: A simpler and more cost-effective option suitable for lighter lean-tos.
  • Pressure-treated lumber base: Offers a balance between cost and durability, resisting rot and insect damage.

2.2 Framing

The framing forms the skeletal structure of the lean-to. Pressure-treated lumber is recommended for its resistance to rot and decay. The framing process involves:

  • Constructing the base frame: This forms the foundation upon which the walls and roof will rest.
  • Erecting the supporting posts or wall framing: These provide vertical support for the roof structure.
  • Installing the roof rafters: These angled members support the roofing material.
  • Sheathing the frame: This provides a solid base for the exterior cladding.

2.3 Roofing

The choice of roofing material depends on factors such as budget, aesthetics, and climate. Common options include:

  • Asphalt shingles: A cost-effective and readily available option, offering good protection from the elements.
  • Metal roofing: Highly durable and long-lasting, providing excellent protection against harsh weather conditions.
  • Corrugated plastic sheeting: A lightweight and relatively inexpensive option suitable for smaller lean-tos.

2.4 Siding and Finishing

The exterior cladding should complement the surrounding landscape and the overall style of the property. Options range from simple plywood to more refined materials such as:

  • Cedar or redwood siding: Provides a natural and aesthetically pleasing finish, requiring minimal maintenance.
  • Vinyl siding: A low-maintenance and durable option, available in a wide range of colors and styles.
  • Metal siding: Highly durable and resistant to damage, offering long-term protection.

Phase 3: Interior Finishing and Enhancements

The interior finishing of the lean-to transforms it from a basic structure into a functional and inviting space. This stage involves:

3.1 Flooring

The choice of flooring depends on the intended use. Options include concrete, pavers, decking, or simple plywood with a sealant.

3.2 Insulation and Weatherproofing

For year-round use, consider adding insulation to the walls and ceiling. Proper weatherproofing is crucial to prevent moisture damage and ensure a comfortable interior environment.

3.3 Electrical and Plumbing

If the lean-to is intended for more extensive use, consider adding electrical outlets and possibly plumbing for water access. This should be done by a qualified professional to ensure safety and compliance with building codes.

3.4 Storage Solutions

Incorporate shelves, cabinets, or other storage solutions to maximize the usable space within the lean-to and maintain a clutter-free environment.

Conclusion

Constructing a lean-to shed is a rewarding project that enhances the functionality and aesthetic appeal of outdoor living spaces. By carefully planning the design, selecting appropriate materials, and executing the construction process methodically, you can create a valuable addition to your property that provides years of enjoyment. Remember to prioritize safety throughout the process and always adhere to local building codes and regulations.

Read More..

Affordable Basic Shed Plans for Gardeners and DIY Enthusiasts

Affordable Basic Shed Plans for Gardeners and DIY Enthusiasts

Affordable Basic Shed Plans for Gardeners and DIY Enthusiasts

The allure of a dedicated garden shed, a haven for tools, supplies, and projects, is undeniable. However, the cost of professionally constructed sheds can often be prohibitive. This comprehensive guide provides detailed plans for constructing affordable, basic sheds suitable for gardeners and DIY enthusiasts, emphasizing practicality and cost-effectiveness. These plans are designed for those with moderate DIY skills and readily available materials, offering a rewarding project that significantly enhances garden functionality.

I. Planning and Design Considerations

Before embarking on construction, meticulous planning is crucial. This involves determining the shed's size, location, and materials, factoring in both budget and practical requirements.

A. Determining Shed Size and Functionality

The ideal size depends on the intended use. A small shed (6ft x 4ft) might suffice for storing basic gardening tools, while larger structures (8ft x 6ft or even 10ft x 8ft) offer ample space for more extensive equipment and projects. Consider the following:

  • Tool storage: Inventory your existing tools and equipment to estimate the required space.
  • Seed starting and potting: If you intend to start seeds or pot plants indoors, allocate sufficient bench space.
  • Storage of fertilizers, pesticides, and other chemicals: Ensure adequate space for secure storage of potentially hazardous materials.
  • Workshop area: If you plan to incorporate a small workshop, account for workbench space and adequate headroom.

B. Choosing the Right Location

Shed placement significantly influences both functionality and aesthetics. Consider:

  • Accessibility: Choose a location that's easily accessible from your house and garden areas.
  • Sunlight and shade: Balance the need for sunlight (for drying tools and starting seeds) with adequate shade to prevent overheating.
  • Ground conditions: Assess the ground for drainage and stability to prevent foundation issues.
  • Local regulations: Check local building codes and regulations regarding shed size, location, and materials.

C. Selecting Materials: A Cost-Effective Approach

Opting for readily available and affordable materials is key to keeping costs down. Pressure-treated lumber is recommended for its durability and resistance to rot and insect damage. Consider the following:

  • Pressure-treated lumber: For the frame, floor, and roof.
  • Plywood or OSB: For sheathing and siding, offering a balance of affordability and durability.
  • Asphalt shingles or corrugated metal: Economical and effective roofing materials.
  • Recycled materials: Repurposing materials whenever possible can significantly reduce costs. Consider using reclaimed wood for shelving or decorative elements.

II. Basic Shed Construction: A Step-by-Step Guide

This section outlines the fundamental steps for constructing a basic 6ft x 4ft garden shed. Adaptations can be made for larger structures.

A. Foundation Preparation

A simple concrete slab or compacted gravel base provides a level and stable foundation. For a concrete slab, mark the perimeter, excavate to the desired depth, and pour the concrete. For a gravel base, compact the gravel thoroughly to create a firm surface.

B. Framing the Base

Construct a rectangular frame using pressure-treated lumber, ensuring squareness and levelness. Securely fasten the frame members using appropriate screws or nails.

C. Erecting the Walls

Frame the walls using pressure-treated lumber, creating vertical studs spaced appropriately for sheathing. Attach the sheathing (plywood or OSB) to the studs, ensuring a tight and weatherproof seal.

D. Installing the Roof

Construct the roof frame using appropriately sized lumber, creating rafters to support the chosen roofing material. Attach the roofing material securely, ensuring proper overlap for waterproofing.

E. Adding Doors and Windows

Install a sturdy door, ideally with a lock for security. Consider adding a small window for ventilation and natural light. Use appropriate weather stripping to maintain a tight seal.

F. Interior Finishing

Install shelving, a workbench (if desired), and any other interior features. Consider using paint or stain to protect the wood and enhance aesthetics.

III. Cost-Saving Strategies

Constructing an affordable shed requires careful planning and resourcefulness. The following strategies can help minimize costs:

  • Source materials from economical suppliers: Compare prices from various lumber yards and hardware stores.
  • Utilize reclaimed materials: Repurpose existing materials whenever possible.
  • Perform the work yourself: Eliminating labor costs is a significant way to reduce expenses.
  • Prioritize essential features: Focus on functionality and postpone non-essential features to a later stage.
  • Consider simple designs: Avoid overly complex designs that require specialized skills and materials.

IV. Safety Considerations

Safety should be paramount throughout the construction process. Always wear appropriate safety gear, including:

  • Safety glasses: To protect your eyes from flying debris.
  • Work gloves: To protect your hands from splinters and injuries.
  • Hearing protection: When using power tools.
  • Respiratory protection: When working with dust or chemicals.

Furthermore, ensure proper handling of tools and materials to prevent accidents. If unsure about any aspect of the construction process, consult with a qualified builder or contractor.

By following these comprehensive plans and employing cost-saving strategies, gardeners and DIY enthusiasts can successfully construct an affordable and functional garden shed, enhancing their gardening experience and creating a valuable addition to their property. Remember that careful planning, diligent execution, and a focus on safety will ensure a rewarding and successful project.

Read More..
 
Bobby Crouser - Powered By Blogger