Friday, November 22, 2024

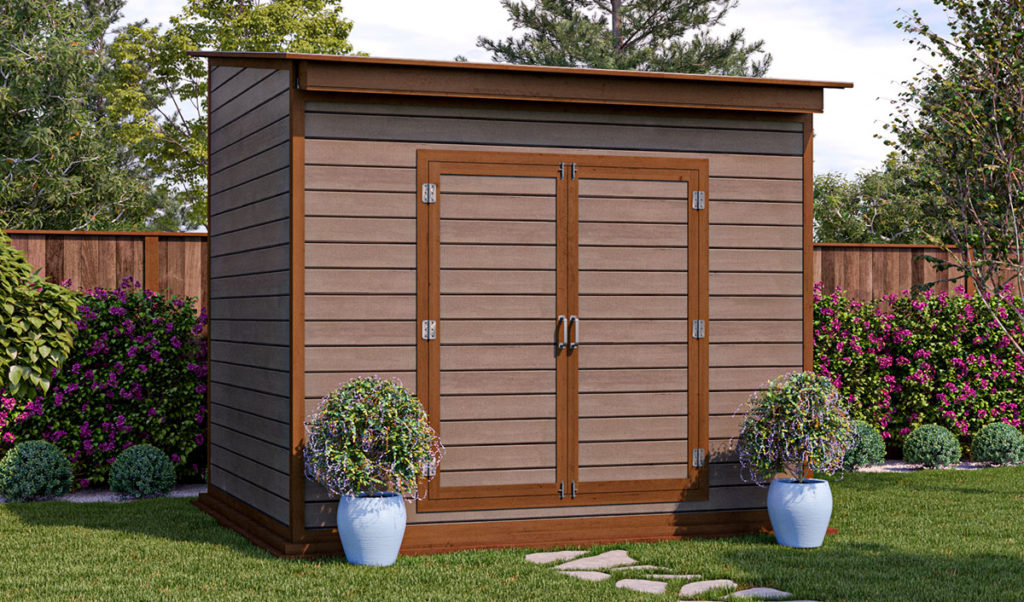
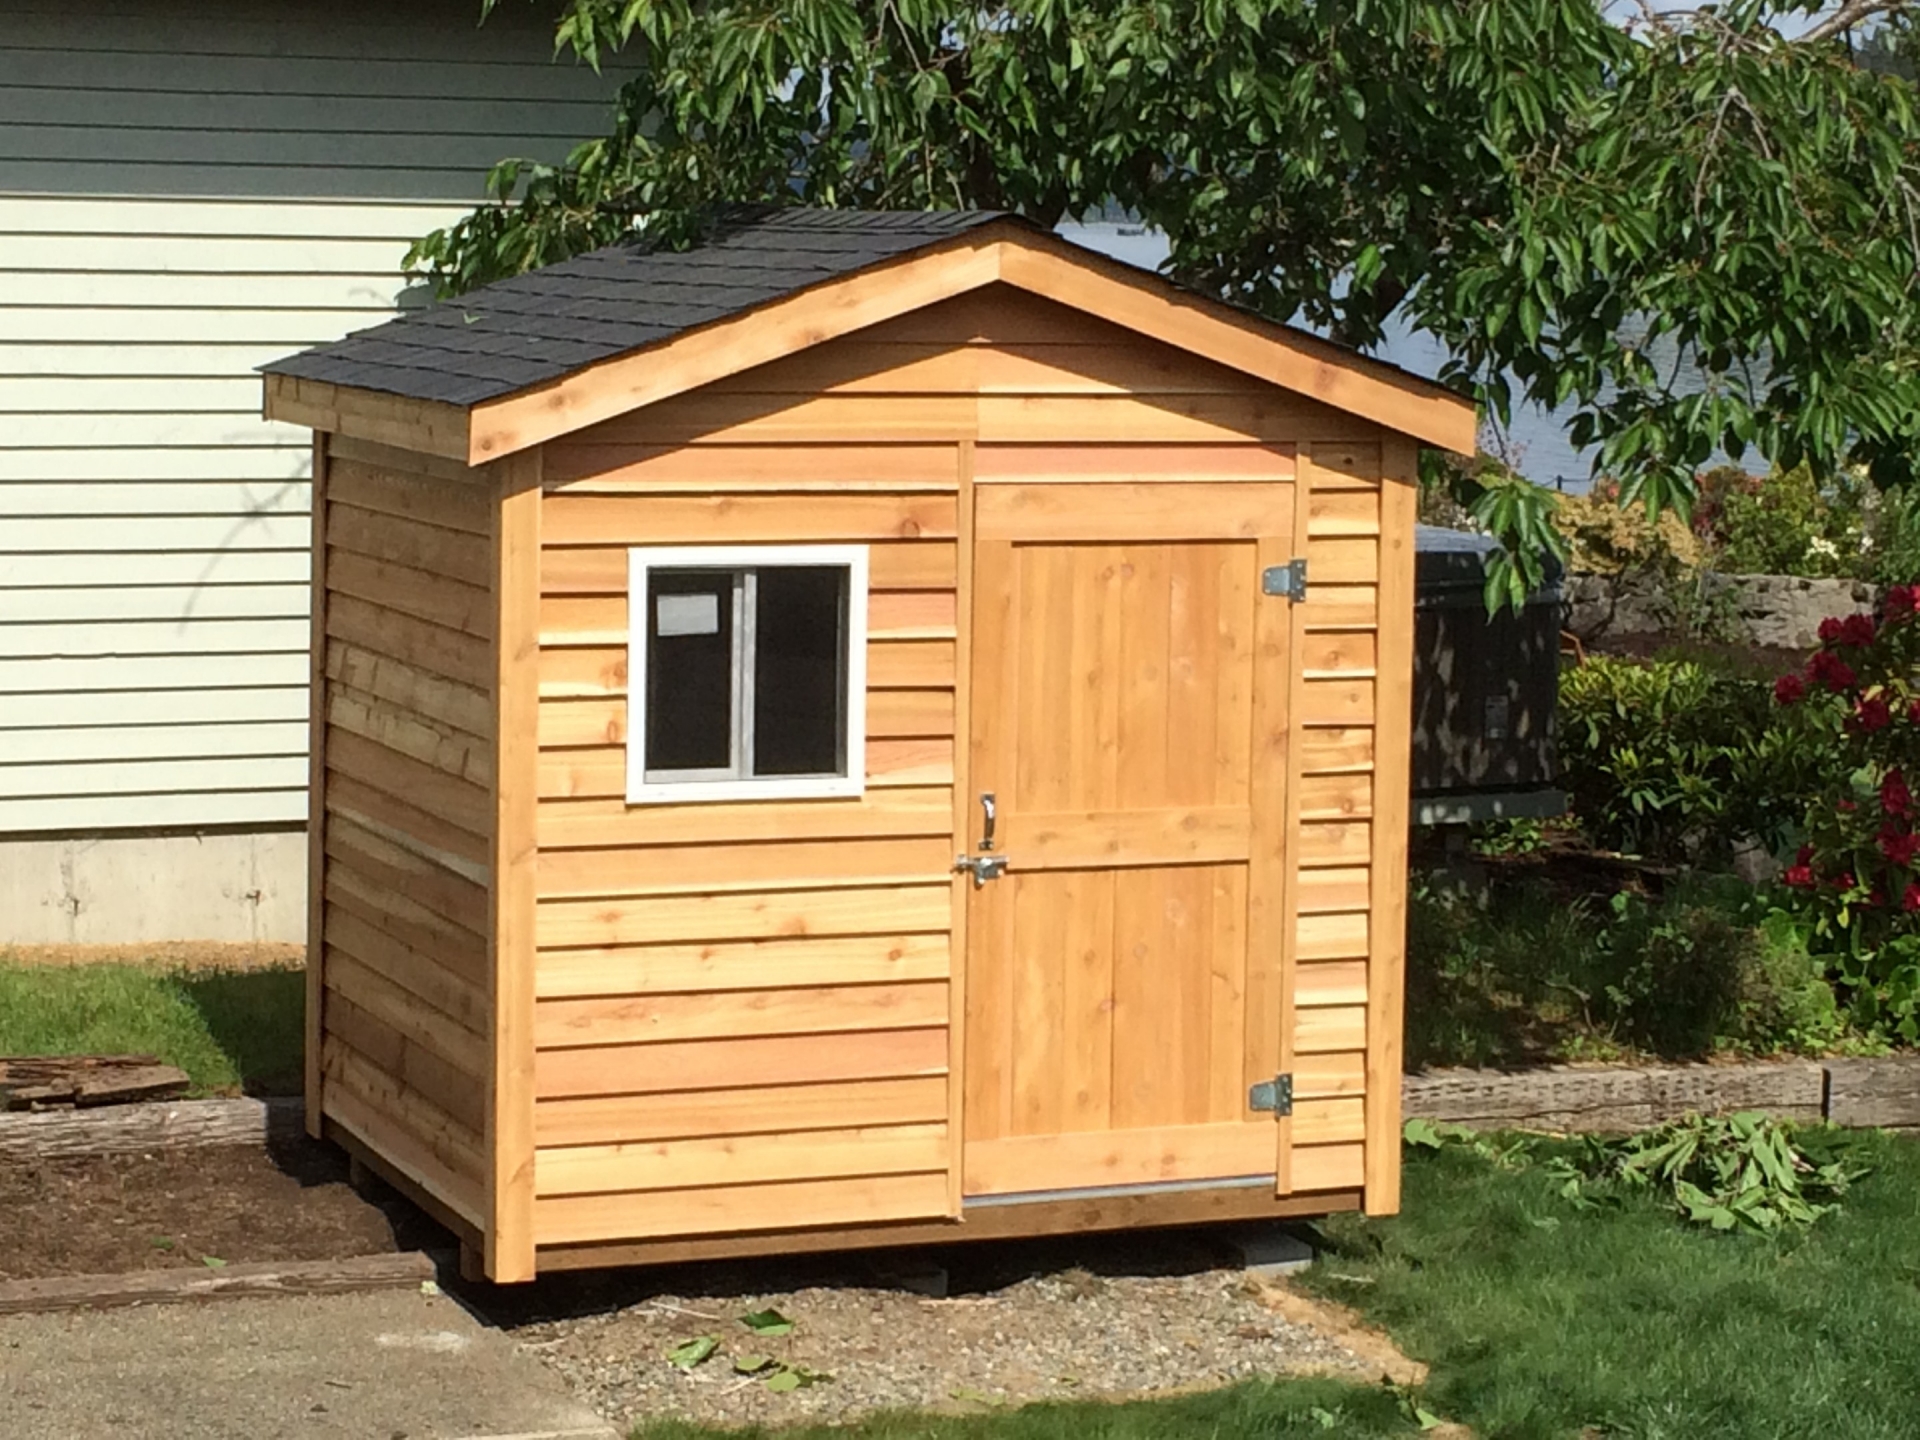
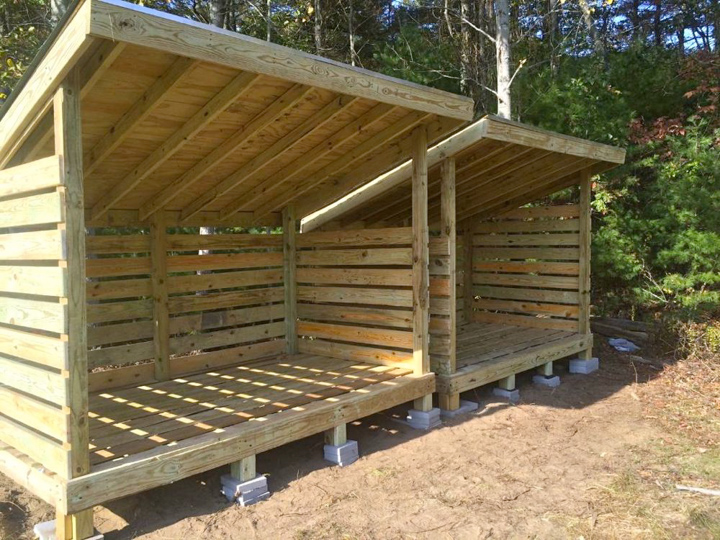
Create the Ultimate Backyard Storage with a Wood Pallet Shed

Create the Ultimate Backyard Storage with a Wood Pallet Shed

The Ultimate Backyard Storage Solution: Constructing a Durable and Aesthetically Pleasing Wood Pallet Shed

The desire for efficient and attractive backyard storage is a common aspiration among homeowners. While pre-fabricated sheds offer convenience, constructing a shed from reclaimed wood pallets provides a unique opportunity to create a customized, cost-effective, and environmentally conscious storage solution. This comprehensive guide will detail the process of building an ultimate backyard storage shed utilizing repurposed wood pallets, emphasizing durability, aesthetics, and functionality.

I. Planning and Preparation: Laying the Foundation for Success

Before embarking on the construction process, meticulous planning and preparation are crucial for a successful outcome. This phase involves several key steps that will significantly impact the project's overall quality and longevity.

A. Site Selection and Assessment

Choosing the ideal location for your pallet shed is paramount. Consider factors such as:

  • Accessibility: Ensure easy access for loading and unloading items.
  • Sunlight and Shade: Balance sun exposure for natural light with sufficient shade to prevent excessive heat buildup.
  • Drainage: Select a site with good drainage to prevent water accumulation and potential rot.
  • Ground Conditions: Assess the ground's stability and consider the need for leveling or foundation preparation.
  • Local Regulations: Check with local authorities regarding building permits and zoning regulations.

B. Pallet Sourcing and Inspection

The quality of the pallets will directly impact the shed's structural integrity. Prioritize pallets that are:

  • Heat-treated (HT): These are safer and less likely to harbor pests.
  • Structurally Sound: Inspect for rot, damage, or loose nails.
  • Consistent Size and Type: Opt for pallets of similar dimensions for easier construction.
  • Clean and Free of Debris: Thoroughly clean the pallets before use.

Consider sourcing pallets from local businesses or recycling centers, ensuring ethical and environmentally responsible procurement.

C. Design and Dimensions

Develop a detailed design plan, including the shed's overall dimensions, door placement, window placement (if desired), and roof style. Consider the amount of storage space needed and the size of the items to be stored. Sketching a design and creating a scaled drawing will greatly aid in the construction process. Factor in the dimensions of the pallets you've sourced to optimize material usage and minimize waste.

II. Construction: Building the Pallet Shed Frame

With the planning complete, the construction phase begins, focusing on building a robust and stable frame.

A. Foundation Preparation

Prepare a level foundation, whether it's a concrete slab, compacted gravel base, or a simple wooden platform. The chosen foundation must be capable of supporting the weight of the completed shed and its contents. Ensure the foundation is appropriately sized to accommodate the shed's dimensions.

B. Frame Assembly

Construct the frame using sturdy pallets, potentially reinforcing them with additional lumber for increased strength. Use galvanized screws or strong nails for fastening. The frame should be square and plumb, ensuring a stable structure. Pay attention to details such as corner bracing and appropriate spacing for walls and roof supports.

C. Wall Construction

Attach the pallets to the frame to create the walls. Ensure proper alignment and secure fastening. You may need to cut or adjust some pallets to fit perfectly. Consider adding extra bracing to strengthen the walls, particularly in areas subjected to high winds or stress.

D. Roof Construction

Construct the roof frame using additional lumber, ensuring it is appropriately sized and angled for adequate water runoff. The roof can be constructed using more pallets, providing a rustic aesthetic. Alternatively, consider using plywood or other roofing materials for a more weatherproof finish. Proper waterproofing is crucial to protect the shed's contents from the elements.

III. Finishing Touches: Enhancing Functionality and Aesthetics

Once the basic structure is complete, attention should turn to enhancing the shed's functionality and aesthetics.

A. Door and Window Installation

Install a sturdy door, ensuring a secure closure. Consider adding a lock for increased security. If windows are included in the design, install them carefully, ensuring weatherproofing to prevent drafts and water ingress. Choose appropriately sized and durable materials for both the doors and windows.

B. Exterior Finishing

Apply a weather-resistant sealant or stain to protect the wood from the elements. This will significantly prolong the shed's lifespan and enhance its aesthetic appeal. Choosing a color that complements the surrounding landscape will further improve the overall look.

C. Interior Finishing

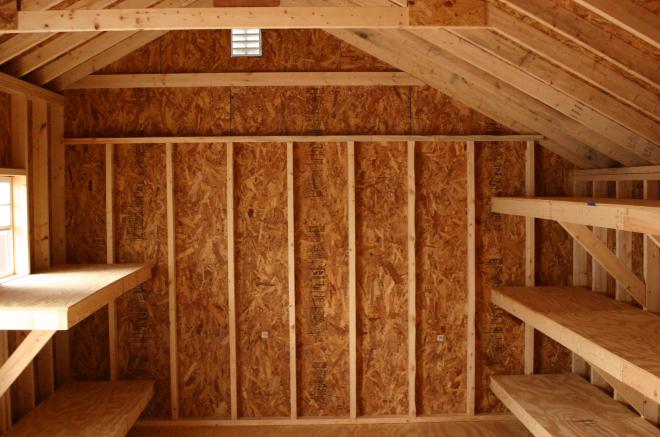
Consider adding shelves or other internal storage solutions to maximize the shed's usable space. Painting the interior walls can enhance the aesthetic appeal and provide a more welcoming storage space. Remember to use paints appropriate for wooden surfaces.

IV. Maintenance and Longevity: Preserving Your Investment

Proper maintenance is essential for ensuring the longevity of your pallet shed. Regular inspections, timely repairs, and proactive measures will significantly extend its useful life.

Regularly inspect the shed for any signs of damage, such as rotting wood, loose nails, or pest infestations. Address these issues promptly to prevent further deterioration. Periodically reapply a weather-resistant sealant or stain to protect the wood from the elements. Keep the shed clean and dry to prevent mold and mildew growth. By following these guidelines, your pallet shed will provide years of reliable and attractive storage.

Constructing a backyard shed from reclaimed wood pallets offers a unique blend of cost-effectiveness, environmental responsibility, and aesthetic appeal. By carefully following the planning, construction, and maintenance guidelines outlined in this comprehensive guide, you can create an ultimate backyard storage solution that meets your specific needs and enhances the overall beauty of your outdoor space. Remember, attention to detail throughout the process is crucial for achieving a durable and aesthetically pleasing result.

Read More..

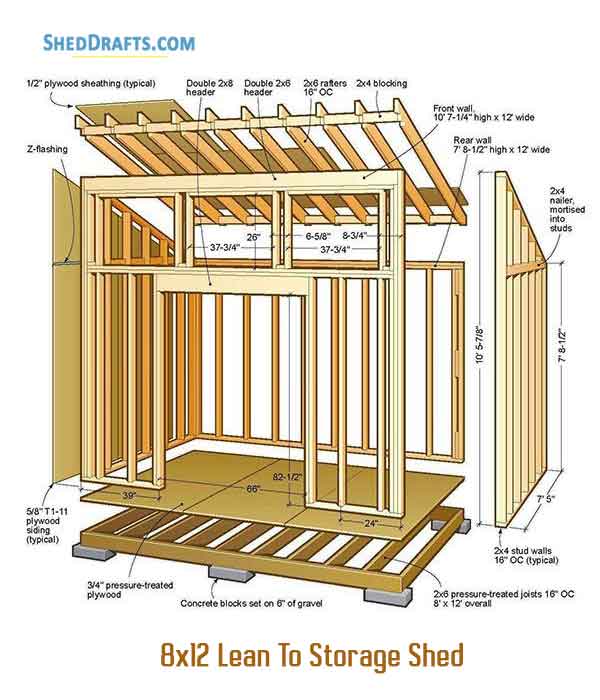
How to Build a Lean-To Shed: Quick Instructions for Building Your Shed

How to Build a Lean-To Shed: Quick Instructions for Building Your Shed

Building Your Lean-To Shed: A Quick Guide

Dreaming of extra storage space without the hefty price tag of a full shed? A lean-to shed is the perfect solution! This simple structure, attached to an existing wall, offers practical storage with a surprisingly straightforward build. Follow these steps, and you'll be enjoying your new lean-to in no time.

Planning Your Lean-To Shed

Before you grab your tools, careful planning is crucial. First, determine the ideal location and size for your lean-to. Consider proximity to existing structures for easy access and utility connections. Measure the length of the wall you'll attach the shed to, ensuring your lean-to's dimensions complement the existing building. Decide on the desired height and depth, sketching a simple design to visualize your project. Remember to check local building codes and obtain necessary permits before starting construction. This preparation minimizes potential setbacks and ensures a smooth building process.

Gathering Your Materials

Next, create a comprehensive materials list. You'll need pressure-treated lumber for the frame, offering durability against the elements. Consider using 4x4 posts for the base, 2x4s for the framing, and plywood or metal roofing for the roof and walls. Don't forget fasteners like screws, nails, and anchors, as well as weatherproof sealant to protect your shed from moisture. A level, tape measure, saw (circular saw is recommended), and a drill are essential tools. Acquire all materials upfront to avoid project delays. A detailed list, checked against your design, will prevent costly trips back to the hardware store.

Constructing the Frame

Begin by preparing the foundation. For a simple lean-to, a concrete slab or a compacted gravel base will suffice. Attach pressure-treated 4x4 posts to this base, creating the vertical supports for your shed's back wall. Make sure these posts are plumb and level, using a level to ensure they are perfectly vertical. Next, attach the horizontal 2x4 beams to the posts and the existing building, creating a sturdy frame. This forms the base structure of your lean-to. Ensure all connections are strong and secure using appropriate fasteners.

Building the Roof

With the frame complete, you'll now construct the roof. Cut and attach rafters to the top of the frame, ensuring proper slope for water runoff. Fasten plywood or metal roofing sheets to the rafters, overlapping edges to create a watertight seal. Consider adding roofing felt or tar paper under the roofing sheets for extra protection. Secure the roofing material with appropriate fasteners, remembering to install any necessary vents or flashing. A properly constructed roof will keep your shed’s contents safe and dry for years to come.

Finishing Touches

Once the roof is secure, you can add the walls. Use plywood sheets or other suitable material, attaching them to the frame. Consider adding a door for easy access to the storage area. Finish by applying a weatherproof sealant to all joints and exposed wood surfaces to protect against moisture damage and extend the life of your shed. A final coat of paint or stain can add a personal touch and enhance the aesthetic appeal of your new lean-to shed.

Congratulations! You've successfully built your own lean-to shed. Enjoy your newly acquired storage space. Remember to regularly inspect your shed for any signs of damage and perform necessary maintenance to ensure it remains in good condition.

Read More..

Thursday, November 21, 2024

Wood Pallet Shed Build: Turn Old Pallets into a Gorgeous Backyard Shed

Wood Pallet Shed Build: Turn Old Pallets into a Gorgeous Backyard Shed

Wood Pallet Shed Build: Turn Old Pallets into a Gorgeous Backyard Shed

Tired of cluttered garages and overflowing storage spaces? Yearning for a charming, rustic addition to your backyard? Then consider transforming discarded wood pallets into a beautiful and functional shed! This project, while requiring some elbow grease, offers a rewarding experience and a unique, eco-friendly structure you'll be proud to showcase. This guide provides a step-by-step process, empowering you to build your own gorgeous pallet shed.

Planning Your Pallet Shed

Before you dive into construction, careful planning is key. First, determine the size and purpose of your shed. Will it house gardening tools, bicycles, or serve as a small workshop? The dimensions will dictate the number of pallets you'll need. Next, source your pallets. Look for sturdy pallets made of pressure-treated lumber (ensure it's safe for outdoor use) and inspect them for rot, damage, and loose nails. Cleaning and prepping the pallets is crucial. Remove any loose nails, debris, and stamps using a hammer, crowbar, and wire brush. Consider sanding for a smoother finish. Finally, sketch a design. Simple designs are easiest for beginners; consider a basic rectangular structure or explore more complex designs with gables or dormers once you're more confident.

Gathering Materials and Tools

Once your design is finalized, gather your materials and tools. You'll need a substantial number of pallets based on your shed's size. In addition to the pallets, acquire these essential items:

  • Foundation materials: Concrete blocks, gravel, or a wooden frame, depending on your preferred base.
  • Fasteners: Galvanized nails, screws, and possibly metal brackets for added strength.
  • Roofing materials: Shingles, corrugated metal, or tar paper, along with roofing nails.
  • Optional additions: Exterior paint or sealant for weather protection, hinges and a latch for the door, and windows for ventilation and light.

Essential tools include a hammer, saw (circular saw recommended), drill, level, measuring tape, safety glasses, and work gloves.

Construction Steps: Building Your Pallet Shed

Foundation and Base

Begin by preparing a level foundation. Whether you opt for concrete blocks, gravel, or a wooden frame, ensure a solid, stable base to prevent settling. This step is crucial for the longevity of your shed.

Wall Construction

Carefully assemble the pallet walls. Position and secure the pallets vertically, ensuring they're level and aligned. Use galvanized nails or screws to create robust connections between the pallets. Strengthen the structure by adding cross bracing where needed. Remember to leave openings for doors and windows.

Roof Construction

Construct the roof frame using additional lumber or repurposed pallets, creating a sturdy support structure for your chosen roofing material. Ensure the roof has adequate slope to prevent water accumulation. Attach your roofing material securely, paying attention to overlapping for weather resistance.

Finishing Touches

Once the main structure is complete, add the finishing touches. Install the door and hinges, add any windows, and apply exterior paint or sealant for protection against the elements. Consider adding a personal touch with decorative elements or landscaping around the shed.

Safety First

Safety should be your top priority throughout the entire process. Always wear appropriate safety gear, including safety glasses and work gloves. Be cautious when handling power tools and ensure the work area is well-lit and free of obstacles. If you're unsure about any aspect of the construction, seek professional advice.

Building a pallet shed is a rewarding project that combines creativity, resourcefulness, and practical skills. With careful planning and execution, you can create a beautiful and functional addition to your backyard that you’ll enjoy for years to come.

Read More..

Craft a Lean-To Shed That Enhances Your Outdoor Living Space

Craft a Lean-To Shed That Enhances Your Outdoor Living Space

Crafting a Lean-To Shed: An Enhancement to Outdoor Living Spaces

The lean-to shed, a deceptively simple structure, offers a remarkable opportunity to expand and enrich outdoor living spaces. Its inherent adaptability allows for a wide range of functionalities, from a practical storage solution to an elegant extension of the home's aesthetic. This comprehensive guide details the planning, construction, and finishing processes involved in creating a lean-to shed that seamlessly integrates with your existing landscape and enhances your enjoyment of the outdoors.

Phase 1: Planning and Design Considerations

The success of any construction project hinges on meticulous planning. Before commencing work on your lean-to shed, several crucial aspects require careful consideration.

1.1 Site Selection and Orientation

The chosen location profoundly impacts the shed's functionality and aesthetic appeal. Consider factors such as:

  • Proximity to existing structures: Ensure sufficient clearance for access and to avoid obstructing views or pathways.
  • Sunlight exposure: Optimize natural light penetration for intended uses. A south-facing orientation (in the northern hemisphere) maximizes solar gain.
  • Drainage: Select a site with good drainage to prevent water accumulation and potential structural damage. Avoid low-lying areas prone to flooding.
  • Accessibility: Ensure easy access for materials delivery during construction and future use of the shed.

1.2 Dimensions and Functionality

Determine the appropriate dimensions based on the intended use. A small lean-to might suffice for storing gardening tools, while a larger structure could serve as a workshop or outdoor dining area. Carefully consider:

  • Length and width: These dimensions directly impact storage capacity or usable space.
  • Height: Sufficient headroom is crucial for comfortable use and movement within the shed.
  • Door placement and size: Ensure easy access for equipment and materials. Consider double doors for larger items.
  • Window placement: Strategic window placement enhances natural light and ventilation.

1.3 Building Codes and Permits

Familiarize yourself with local building codes and zoning regulations before commencing construction. In many jurisdictions, permits are required for structures exceeding specific size limits or involving certain construction materials. Obtaining the necessary permits ensures compliance and avoids potential legal issues.

Phase 2: Materials and Construction

The selection of appropriate materials significantly impacts the shed's durability, aesthetic appeal, and overall cost. A balanced approach considering both practicality and longevity is crucial.

2.1 Foundation

A robust foundation is paramount for structural integrity. Options include:

  • Concrete slab: Provides a durable and level base, ideal for heavier structures.
  • Gravel base: A simpler and more cost-effective option suitable for lighter lean-tos.
  • Pressure-treated lumber base: Offers a balance between cost and durability, resisting rot and insect damage.

2.2 Framing

The framing forms the skeletal structure of the lean-to. Pressure-treated lumber is recommended for its resistance to rot and decay. The framing process involves:

  • Constructing the base frame: This forms the foundation upon which the walls and roof will rest.
  • Erecting the supporting posts or wall framing: These provide vertical support for the roof structure.
  • Installing the roof rafters: These angled members support the roofing material.
  • Sheathing the frame: This provides a solid base for the exterior cladding.

2.3 Roofing

The choice of roofing material depends on factors such as budget, aesthetics, and climate. Common options include:

  • Asphalt shingles: A cost-effective and readily available option, offering good protection from the elements.
  • Metal roofing: Highly durable and long-lasting, providing excellent protection against harsh weather conditions.
  • Corrugated plastic sheeting: A lightweight and relatively inexpensive option suitable for smaller lean-tos.

2.4 Siding and Finishing

The exterior cladding should complement the surrounding landscape and the overall style of the property. Options range from simple plywood to more refined materials such as:

  • Cedar or redwood siding: Provides a natural and aesthetically pleasing finish, requiring minimal maintenance.
  • Vinyl siding: A low-maintenance and durable option, available in a wide range of colors and styles.
  • Metal siding: Highly durable and resistant to damage, offering long-term protection.

Phase 3: Interior Finishing and Enhancements

The interior finishing of the lean-to transforms it from a basic structure into a functional and inviting space. This stage involves:

3.1 Flooring

The choice of flooring depends on the intended use. Options include concrete, pavers, decking, or simple plywood with a sealant.

3.2 Insulation and Weatherproofing

For year-round use, consider adding insulation to the walls and ceiling. Proper weatherproofing is crucial to prevent moisture damage and ensure a comfortable interior environment.

3.3 Electrical and Plumbing

If the lean-to is intended for more extensive use, consider adding electrical outlets and possibly plumbing for water access. This should be done by a qualified professional to ensure safety and compliance with building codes.

3.4 Storage Solutions

Incorporate shelves, cabinets, or other storage solutions to maximize the usable space within the lean-to and maintain a clutter-free environment.

Conclusion

Constructing a lean-to shed is a rewarding project that enhances the functionality and aesthetic appeal of outdoor living spaces. By carefully planning the design, selecting appropriate materials, and executing the construction process methodically, you can create a valuable addition to your property that provides years of enjoyment. Remember to prioritize safety throughout the process and always adhere to local building codes and regulations.

Read More..

Affordable Basic Shed Plans for Gardeners and DIY Enthusiasts

Affordable Basic Shed Plans for Gardeners and DIY Enthusiasts

Affordable Basic Shed Plans for Gardeners and DIY Enthusiasts

The allure of a dedicated garden shed, a haven for tools, supplies, and projects, is undeniable. However, the cost of professionally constructed sheds can often be prohibitive. This comprehensive guide provides detailed plans for constructing affordable, basic sheds suitable for gardeners and DIY enthusiasts, emphasizing practicality and cost-effectiveness. These plans are designed for those with moderate DIY skills and readily available materials, offering a rewarding project that significantly enhances garden functionality.

I. Planning and Design Considerations

Before embarking on construction, meticulous planning is crucial. This involves determining the shed's size, location, and materials, factoring in both budget and practical requirements.

A. Determining Shed Size and Functionality

The ideal size depends on the intended use. A small shed (6ft x 4ft) might suffice for storing basic gardening tools, while larger structures (8ft x 6ft or even 10ft x 8ft) offer ample space for more extensive equipment and projects. Consider the following:

  • Tool storage: Inventory your existing tools and equipment to estimate the required space.
  • Seed starting and potting: If you intend to start seeds or pot plants indoors, allocate sufficient bench space.
  • Storage of fertilizers, pesticides, and other chemicals: Ensure adequate space for secure storage of potentially hazardous materials.
  • Workshop area: If you plan to incorporate a small workshop, account for workbench space and adequate headroom.

B. Choosing the Right Location

Shed placement significantly influences both functionality and aesthetics. Consider:

  • Accessibility: Choose a location that's easily accessible from your house and garden areas.
  • Sunlight and shade: Balance the need for sunlight (for drying tools and starting seeds) with adequate shade to prevent overheating.
  • Ground conditions: Assess the ground for drainage and stability to prevent foundation issues.
  • Local regulations: Check local building codes and regulations regarding shed size, location, and materials.

C. Selecting Materials: A Cost-Effective Approach

Opting for readily available and affordable materials is key to keeping costs down. Pressure-treated lumber is recommended for its durability and resistance to rot and insect damage. Consider the following:

  • Pressure-treated lumber: For the frame, floor, and roof.
  • Plywood or OSB: For sheathing and siding, offering a balance of affordability and durability.
  • Asphalt shingles or corrugated metal: Economical and effective roofing materials.
  • Recycled materials: Repurposing materials whenever possible can significantly reduce costs. Consider using reclaimed wood for shelving or decorative elements.

II. Basic Shed Construction: A Step-by-Step Guide

This section outlines the fundamental steps for constructing a basic 6ft x 4ft garden shed. Adaptations can be made for larger structures.

A. Foundation Preparation

A simple concrete slab or compacted gravel base provides a level and stable foundation. For a concrete slab, mark the perimeter, excavate to the desired depth, and pour the concrete. For a gravel base, compact the gravel thoroughly to create a firm surface.

B. Framing the Base

Construct a rectangular frame using pressure-treated lumber, ensuring squareness and levelness. Securely fasten the frame members using appropriate screws or nails.

C. Erecting the Walls

Frame the walls using pressure-treated lumber, creating vertical studs spaced appropriately for sheathing. Attach the sheathing (plywood or OSB) to the studs, ensuring a tight and weatherproof seal.

D. Installing the Roof

Construct the roof frame using appropriately sized lumber, creating rafters to support the chosen roofing material. Attach the roofing material securely, ensuring proper overlap for waterproofing.

E. Adding Doors and Windows

Install a sturdy door, ideally with a lock for security. Consider adding a small window for ventilation and natural light. Use appropriate weather stripping to maintain a tight seal.

F. Interior Finishing

Install shelving, a workbench (if desired), and any other interior features. Consider using paint or stain to protect the wood and enhance aesthetics.

III. Cost-Saving Strategies

Constructing an affordable shed requires careful planning and resourcefulness. The following strategies can help minimize costs:

  • Source materials from economical suppliers: Compare prices from various lumber yards and hardware stores.
  • Utilize reclaimed materials: Repurpose existing materials whenever possible.
  • Perform the work yourself: Eliminating labor costs is a significant way to reduce expenses.
  • Prioritize essential features: Focus on functionality and postpone non-essential features to a later stage.
  • Consider simple designs: Avoid overly complex designs that require specialized skills and materials.

IV. Safety Considerations

Safety should be paramount throughout the construction process. Always wear appropriate safety gear, including:

  • Safety glasses: To protect your eyes from flying debris.
  • Work gloves: To protect your hands from splinters and injuries.
  • Hearing protection: When using power tools.
  • Respiratory protection: When working with dust or chemicals.

Furthermore, ensure proper handling of tools and materials to prevent accidents. If unsure about any aspect of the construction process, consult with a qualified builder or contractor.

By following these comprehensive plans and employing cost-saving strategies, gardeners and DIY enthusiasts can successfully construct an affordable and functional garden shed, enhancing their gardening experience and creating a valuable addition to their property. Remember that careful planning, diligent execution, and a focus on safety will ensure a rewarding and successful project.

Read More..

How to Build a Wood Pallet Shed for Your Tools and Equipment

How to Build a Wood Pallet Shed for Your Tools and Equipment

Building Your Own Wood Pallet Shed: A Step-by-Step Guide

Hey there, fellow DIY enthusiasts! So, you're thinking about building a shed, huh? And not just any shed, but one made from reclaimed wood pallets? Smart move! It's a budget-friendly way to get organized and add some serious charm to your backyard. This guide will walk you through building your own wood pallet shed, from gathering materials to the final touches. Let's get started!

1. Planning and Preparation: Laying the Groundwork

Before you even think about hammering a nail, you need a solid plan. This isn't rocket science, but a little forethought goes a long way.

1.1 Choosing Your Pallet Source

This is the fun part (well, maybe second to the actual building!). You'll need to find a source for your pallets. Check with local businesses â€" grocery stores, construction sites, or even your friendly neighborhood lumberyard. Make sure to ask permission before taking any pallets! Not all pallets are created equal, some may be treated with chemicals so you'll need to ask about that before using them in your project. You'll want sturdy pallets with minimal damage; aim for pallets that are relatively clean and free of rot or insect infestation.

1.2 Designing Your Shed

Next up: the design. How big do you need your shed to be? Consider the tools and equipment you'll be storing. Do you need shelves? A workbench? A door? A window for natural light? Sketch out a simple plan, even if it's just a rough drawing on a napkin. This will help you determine how many pallets you'll need and what other materials you'll have to purchase. Remember, you can always adapt your plan as you go, so don't stress over perfection at this stage. Consider the size of your pallets and try to design the shed around their dimensions to minimize cutting.

1.3 Gathering Materials and Tools

Now for the shopping list. Besides the pallets, you’ll need:
  • Concrete blocks or a suitable foundation: This will keep your shed off the ground and prevent rot.
  • Post anchors or similar fasteners: To secure your base supports.
  • Pressure-treated lumber: For the base framing (if needed, depending on your foundation method).
  • Screws (long and strong ones!): Lots of them. Exterior-grade screws are a must.
  • Hammer (or impact driver): For those stubborn nails (if any).
  • Measuring tape and level: Essential for accurate construction.
  • Safety glasses and work gloves: Always prioritize safety!
  • Saw (circular saw or hand saw): For cutting pallets.
  • Drill with appropriate drill bits: For pilot holes.
  • Plywood or other sheeting (optional): For the roof and walls, if you want a more finished look. You can also use more pallets to fill in gaps.
  • Roofing material (optional): Tar paper, shingles, or even a tarp to protect your belongings from the elements.
  • Wood sealant or paint (optional): To protect the wood and give your shed a personal touch.

2. Construction: Building Your Pallet Haven

Alright, let's build!

2.1 Building the Base

Start with a sturdy foundation. Concrete blocks are a simple and affordable option. Place them in a rectangle according to your shed's dimensions, ensuring they're level. If you're using pressure-treated lumber for a frame, secure it to the blocks using post anchors. This step is critical for stability and longevity. Ensure the ground is level before starting.

2.2 Assembling the Walls

Now, it's time to get creative with your pallets! Disassemble pallets if needed, inspecting for any rot or damage. Start assembling the walls by stacking and securing pallets together using screws. Be sure to pre-drill your screw holes to prevent splitting the wood. You may need to cut some pallets to fit your dimensions. Consider adding bracing between pallets for extra strength. If you're adding sheeting for a more finished look, attach it now.

2.3 Erecting the Walls

Carefully lift and secure the walls onto your base. Make sure they're plumb (perfectly vertical) and well-aligned before securing them to the base. Use additional bracing if necessary to prevent wobbling. Remember to measure twice and cut once to avoid unnecessary work!

2.4 Constructing the Roof

The roof is arguably the most important structural element. If you're using pallets, consider building a simple gable roof. This involves creating two angled sections that meet at the peak. Securely attach the roof structure to the walls. Remember to use strong enough supports for the roof. Use plywood or other sheeting to create a solid and waterproof roof, and then add your chosen roofing material.

2.5 Adding the Door

Time to give your shed some personality. If you’re building a door, use a combination of pallets and possibly some additional lumber or plywood for strength and structure. You'll want to ensure that your door is securely fastened to the frame. Remember to consider the door’s size and location to balance functionality and the aesthetic of the shed. Hang the door using hinges and add a latch or lock for security.

2.6 Finishing Touches

Now for the fun part: adding the finishing touches! Consider adding shelves, a workbench, or even a small window for light. Seal or paint your pallet shed to protect it from the elements and add a personal touch. A coat of stain or paint can dramatically improve the look of your shed and give it longevity.

3. Enjoy Your New Pallet Shed!

Congratulations! You've successfully built your own wood pallet shed. Take a step back and admire your handiwork. Now you can start organizing your tools and equipment, giving you a dedicated space for your projects.

Frequently Asked Questions

Q: How much does it cost to build a pallet shed?

The cost varies greatly depending on the size of your shed and the materials you use. The best thing about using pallets is that the primary material cost is very low (or even free!), but remember to factor in the cost of any additional lumber, screws, concrete blocks, roofing material, and tools.

Q: How long does it take to build a pallet shed?

The time needed also depends on the size and complexity of your design. A small, simple shed could be built in a weekend, while a larger, more elaborate structure might take several weekends.

Q: Are pallets safe to use for a shed?

It's crucial to check the type of pallet you're using. Some pallets are treated with chemicals (like methyl bromide) and should not be used for projects that involve contact with the soil or food, or anywhere where you’ll be inside the shed frequently. Look for heat-treated pallets (marked with "HT") or pallets from reputable sources that can confirm treatment types.

Q: How do I make my pallet shed more weather-resistant?

Applying a wood sealant or paint is highly recommended to protect the wood from moisture and the elements. A good quality roofing material is also essential. Consider adding flashing around the roof and walls to prevent water penetration.

Q: Can I add electricity to my pallet shed?

Yes, but only if you are comfortable working with electricity and have the necessary permits. This is definitely a job for a professional unless you have significant electrical experience. You'll need to ensure proper grounding, wiring, and safety precautions to avoid hazards.

Remember, this is a guide, and there’s always room for your own creativity and adjustments. Have fun with it, and don’t be afraid to experiment! Happy building!
Read More..

Wednesday, November 20, 2024

Step-by-Step Guide to Building a Lean-To Shed That Will Last

Step-by-Step Guide to Building a Lean-To Shed That Will Last

Building a Lean-To Shed That Will Stand the Test of Time

Dreaming of a sturdy lean-to shed to house your garden tools, firewood, or extra storage? This detailed guide walks you through every step, ensuring your lean-to not only looks great but also withstands the elements for years to come. We'll prioritize quality materials and construction techniques, guaranteeing a structure you'll be proud of.

Planning Your Lean-To Shed: Laying the Foundation for Success

Before you even pick up a hammer, careful planning is crucial. Measure the space you have available and decide on the dimensions of your lean-to. Consider the height you need for easy access and the desired length for sufficient storage. Sketch a simple plan, noting the location of the door, windows (if any), and the placement of supporting posts. This blueprint will guide your construction and help you calculate the necessary materials.

Choosing the Right Location and Obtaining Permits

Select a level location with good drainage to prevent water accumulation around your shed's foundation. Check local building codes and zoning regulations; you might need to obtain building permits before starting construction. Contact your local authority to inquire about any necessary paperwork or inspections.

Material Selection: Investing in Durability

Don't skimp on materials! Invest in pressure-treated lumber for the foundation and framing to ensure resistance against rot and insects. Opt for a high-quality roofing material like asphalt shingles or metal roofing for long-lasting weather protection. Consider using galvanized screws and fasteners for added corrosion resistance. Choosing the right materials upfront will save you headachesâ€"and moneyâ€"in the long run.

Constructing the Frame: Building a Solid Base

Begin by creating a solid foundation. This could be a simple concrete slab, a gravel base, or even a compacted earth base, depending on your budget and soil conditions. Once the foundation is set, erect the main support posts. These posts should be firmly anchored to the foundation using concrete footings for maximum stability. Ensure the posts are plumb (perfectly vertical) and securely fastened, using a level and bracing to maintain alignment.

Framing the Walls and Roof

Once the main support posts are in place, you'll frame the walls and roof using the pressure-treated lumber. Cut the lumber to the appropriate lengths according to your plan. Use appropriate fasteners (galvanized nails or screws) to securely attach the framing members. Remember to maintain consistent spacing between the studs for structural integrity and even sheathing.

Sheathing and Roofing: Creating a Weather-Resistant Envelope

Next, sheathe the walls and roof with plywood or OSB (oriented strand board). This will provide a solid surface for the siding and roofing materials. Ensure the sheathing is properly fastened to the framing, creating a strong and rigid structure. After the sheathing is complete, install your chosen roofing material according to the manufacturer's instructions. Pay close attention to overlapping the shingles or panels to ensure a watertight seal.

Adding the Finishing Touches

Once the roof is finished, you can add the siding, doors, and windows. Consider adding a weather barrier under the siding to further protect the structure from moisture. Choose a durable siding material that complements your style. Finally, install a door and any windows, ensuring proper sealing to prevent drafts and leaks. A final coat of exterior paint or stain will protect the wood and add aesthetic appeal.

Maintaining Your Lean-To Shed: Ensuring Longevity

Regular maintenance is key to extending the lifespan of your lean-to shed. Inspect the structure regularly for any signs of damage, such as loose boards, rotting wood, or damage to the roofing material. Address these issues promptly to prevent more extensive problems. Clean gutters and downspouts regularly to prevent water damage. A yearly coat of paint or stain will help protect the wood from the elements and maintain its appearance.

By following these steps and prioritizing quality materials and construction techniques, you'll build a lean-to shed that will provide years of reliable storage and add value to your property. Remember, taking your time and paying attention to detail will ensure the longevity of your project. Happy building!

Read More..

How to Build a Strong and Affordable Wood Pallet Shed for Your Yard

How to Build a Strong and Affordable Wood Pallet Shed for Your Yard

Building Your Dream (and Budget-Friendly!) Pallet Shed

Hey there, fellow DIY enthusiasts! So, you're dreaming of a backyard shed, but the prices at the home improvement stores are making your wallet weep? Don't despair! You can totally build a sturdy and surprisingly attractive shed using reclaimed wood pallets â€" and save a ton of money in the process. This guide will walk you through building your own pallet shed, step-by-step, in a way that even a beginner can understand. Let's get started!

1. Planning Your Pallet Paradise: The Design Phase

Before you even think about grabbing a hammer, let's get the planning sorted. This is crucial for a successful project, trust me!

1.1 Size and Layout:

First things first: how big do you want your shed to be? Consider what you'll be storing. A small shed for tools might only need 4ft x 6ft, while a larger one for bikes and garden supplies could be 8ft x 10ft or even bigger. Remember to check your local building codes for any size restrictions.

1.2 Location, Location, Location:

Where will your shed live? Choose a level, well-drained spot that's accessible but not in the way. Think about sunlight â€" do you need a sunny spot for drying things, or would some shade be preferable? Also, consider proximity to power sources if you plan to add electricity later.

1.3 Pallet Sourcing:

This is where the real savings begin! You'll need to source your pallets. Check with local businesses â€" grocery stores, construction sites, and even breweries often have pallets they're happy to get rid of for free or a small fee. Make sure to inspect them carefully for damage before you take them. Look for pallets that are sturdy and relatively free of rot or insect damage. You'll likely need quite a few, so start your search early!

1.4 Tools and Materials:

Beyond the pallets themselves, you’ll need a few essential tools and materials. This list will vary depending on your design but here's a basic starter kit:

  • Measuring tape
  • Level
  • Hammer
  • Crowbar (for dismantling pallets)
  • Saw (circular saw or hand saw)
  • Screws (various lengths)
  • Drill (with drill bits)
  • Safety glasses
  • Work gloves
  • Post hole digger (if you're setting the shed on posts)
  • Concrete (if setting on posts)
  • Wooden posts (if setting on posts)
  • Roofing felt or other weatherproofing material
  • Optional: Paint or stain to protect and beautify your shed.

2. Building the Foundation: Getting Down to Earth (Literally)

The foundation is key to a stable shed. You have a couple of options here:

2.1 Concrete Slab Foundation:

This is the most sturdy option, but also the most expensive and time-consuming. If you go this route, you'll need to pour a concrete slab to the dimensions of your shed. This requires proper preparation of the ground and following concrete mixing instructions carefully.

2.2 Wooden Post Foundation:

This is a more budget-friendly and DIY-friendly approach. Dig holes at each corner and, possibly, in the middle of longer sides. Set treated wooden posts in the holes, ensuring they are level and plumb, and fill the holes with concrete to secure them. This foundation provides good stability while keeping costs down.

3. Constructing the Walls: Pallet by Pallet

Now for the fun part! Carefully dismantle your pallets, removing any loose nails or broken wood. Inspect each board for damage and only use the strong, usable pieces. You can choose to use the whole pallet boards, or cut them down to size for better control over the wall dimensions.

Once you have your boards ready, you can start assembling the walls. Start by constructing a frame using some of the sturdier boards, creating a rectangular structure for each wall. Then, attach the pallet boards to this frame, creating a solid and visually appealing wall. Make sure to use plenty of screws for a secure structure.

Remember to leave openings for doors and windows (if you're adding those!). You can frame these openings as you build the walls or cut them out later.

4. Roof Construction: Keeping the Elements Out

The roof design depends on your preference and shed size. A simple gable roof (two sloping sides) is relatively easy to construct. You'll need to construct roof trusses (triangular frames) using sturdy wood. Attach these trusses to the top of your walls.

Once the trusses are in place, cover the roof with plywood sheets or more pallet boards (if using thinner boards). Finally, add roofing felt or other weatherproofing material to protect your shed from the elements. If you really want to go all out, consider adding shingles for a more professional look!

5. Adding the Finishing Touches: Personalization and Protection

Your shed is almost complete! Now is the time to add doors, windows, and any other personal touches. A simple door can be made from more pallet wood, or you can use a pre-made door. You can also build simple windows using glass or plexiglass. Remember to secure everything with screws or hinges.

Finally, consider protecting your hard work by applying a coat of weather-resistant paint or stain. This will not only make your shed look great, but it will also extend its lifespan significantly, shielding it from rot and pests. Consider colors that complement your yard!

Commonly Asked Questions

Q: How long does it take to build a pallet shed?

A: This depends on your experience and the shed's size. A small shed could take a weekend, while a larger, more complex one might take several weekends.

Q: Are all pallets safe to use?

A: No. Some pallets are treated with chemicals, making them unsuitable for use in construction. Look for heat-treated pallets (HT) â€" they're safe to use. Avoid pallets marked with the symbol "MB" (methyl bromide) as it's a dangerous fumigant.

Q: How do I secure the pallets to each other?

A: Use exterior-grade screws and a drill. Pre-drilling holes will prevent the wood from splitting.

Q: Do I need a building permit?

A: Possibly. Check with your local building department. Regulations vary depending on the size and location of your shed.

Q: Can I add electricity to my pallet shed?

A: Yes, but this requires electrical knowledge and adherence to local electrical codes. It's best to consult with a qualified electrician if you're not comfortable working with electricity.

There you have it! Building a pallet shed is a rewarding project that can save you a lot of money. Remember to prioritize safety, plan carefully, and take your time. With a bit of effort and creativity, you'll have a beautiful and functional shed in your backyard in no time. Happy building!
Read More..

Tuesday, November 19, 2024

Compact and Functional 8x6 Wood Shed Plans for Small Yards

Compact and Functional 8x6 Wood Shed Plans for Small Yards

Compact & Functional 8x6 Wood Shed Plans for Small Yards

So, you've got a small yard and a big need for extra storage? Don't despair! An 8x6 wood shed is the perfect solution. It's big enough to be genuinely useful but small enough to not overwhelm your space. This guide will walk you through building your own, from planning to finishing touches. Let's get started!

Planning Your 8x6 Wood Shed

Before you even think about grabbing a hammer, planning is key. This isn't just about measurements; it's about ensuring your shed fits seamlessly into your yard and meets your storage needs.

Choosing Your Location

Where will your shed live? Consider these factors:

  • Accessibility: Will you need easy access for a wheelbarrow or lawnmower? Leave enough space around the shed for maneuverability.
  • Sunlight: Too much direct sun can damage the wood over time. Consider placing it in a partially shaded area.
  • Ground Conditions: Is your ground level and firm? You'll need a solid foundation. Sloping ground may require extra work.
  • Local Regulations: Check with your local council or homeowner's association about any building restrictions or permits you might need.

Materials List: What You'll Need

This is a basic list; you might need more or less depending on your specific design and the type of wood you choose. Always buy extra â€" it's better to have leftover materials than to run short halfway through the project!

  • Pressure-treated lumber for the foundation: This will resist rot and insect damage.
  • Untreated lumber for the frame and walls: Choose a type that's durable and easy to work with, like cedar or redwood.
  • Roofing materials: Asphalt shingles are a cost-effective and durable option. Consider metal roofing for a longer lifespan.
  • Sheathing: Plywood or OSB (Oriented Strand Board) for covering the walls.
  • Siding: This is for the exterior finish. Options include wood planks, vinyl, or metal siding.
  • Door and window hardware: Don't forget hinges, handles, and a lock!
  • Concrete mix or gravel for the base: Depending on your chosen foundation method.
  • Fasteners: Nails, screws, and possibly bolts.
  • Wood preservative and sealant: To protect your wood from the elements.

Foundation Options

You have several choices for your shed's foundation:

  • Concrete slab: The most durable but also the most expensive and labor-intensive option.
  • Gravel base: A simpler and cheaper option, suitable for well-drained soil.
  • Concrete piers: Offers a good balance between cost and durability.

Building Your 8x6 Wood Shed: A Step-by-Step Guide

This is a simplified overview. Detailed plans are available online and in books. Always prioritize safety and use appropriate safety gear.

Step 1: Preparing the Foundation

Level the ground and excavate to the depth required for your chosen foundation. If using a concrete slab, pour and level the concrete according to the manufacturer's instructions. For a gravel base, compact the gravel firmly.

Step 2: Building the Frame

Construct the floor frame using pressure-treated lumber. Assemble the wall frames, ensuring they are square and plumb. Use a level frequently!

Step 3: Raising the Walls

Carefully lift and secure the wall frames onto the floor frame. Use temporary bracing to keep them stable until the roof is in place.

Step 4: Installing the Roof

Construct the roof trusses or rafters. Attach them to the top plates of the walls. Install the sheathing and roofing material.

Step 5: Adding the Sheathing and Siding

Attach sheathing to the exterior walls. Then install your chosen siding. Ensure all materials are properly fastened and sealed.

Step 6: Installing the Door and Windows

Cut openings for the door and windows, if desired. Install the door and windows, ensuring they are securely fastened and operate smoothly.

Step 7: Finishing Touches

Add any trim work, paint or stain the exterior, and seal all joints to protect the wood from moisture. Consider adding gutters to manage rainwater.

Tips for Success

  • Take your time: Rushing can lead to mistakes. Work methodically and double-check your measurements.
  • Use quality materials: Investing in good lumber and fasteners will save you headaches and money in the long run.
  • Ask for help: Don't hesitate to ask a friend or family member for assistance, especially with heavier tasks.
  • Follow safety guidelines: Always wear appropriate safety gear, such as safety glasses, gloves, and ear protection.
  • Enjoy the process!: Building your own shed can be a rewarding experience. Take pride in your handiwork.

Commonly Asked Questions

Here are some questions people often ask about building 8x6 wood sheds:

Q: Do I need a building permit?

A: It depends on your local regulations. Check with your local council or homeowner's association to find out.

Q: How long will it take to build?

A: This depends on your experience level and the complexity of your design. Expect to spend several weekends, or even longer, on the project.

Q: How much will it cost?

A: The cost varies greatly depending on materials and labor. You can build a basic shed for a few hundred dollars, while a more elaborate design could cost thousands.

Q: Can I build this shed myself, even if I'm not experienced?

A: Yes, but it will require more time, patience, and research. There are many resources available online and in libraries to help you.

Q: What kind of wood should I use?

A: Pressure-treated lumber for the foundation is essential. For the rest of the structure, cedar or redwood are good choices for their durability and resistance to rot.

Q: What if I run into problems during construction?

A: Don't panic! Consult your plans, search for online tutorials, or ask for help from a more experienced builder. There are many resources available to assist you.

Building an 8x6 wood shed is a fantastic project for any homeowner. With careful planning and attention to detail, you can create a valuable addition to your property that will last for years to come. Good luck!

Read More..

How to Design and Build an 8x12 Shed with Loft for More Space

How to Design and Build an 8x12 Shed with Loft for More Space

Building Your Dream 8x12 Shed with Loft: A Step-by-Step Guide

So, you're thinking about building an 8x12 shed with a loft? That's awesome! It's a fantastic project that can add serious storage space â€" and even a little extra hangout room â€" to your property. It might seem daunting at first, but trust me, with a little planning and elbow grease, you can totally do this. This guide will walk you through the entire process, from initial design to the final touches. Grab your coffee, let's get started!

Phase 1: Design and Planning â€" Laying the Foundation for Success

Before you even think about picking up a hammer, you need a solid plan. This isn't just about slapping some wood together; it's about building something safe, sturdy, and that meets your specific needs.

Choosing the Right Location

Where will your shed live? Consider things like access (you’ll need to get materials to the site!), sunlight (for natural light in the loft, maybe?), and proximity to utilities (electricity if you plan on wiring it). Check your local building codes â€" you might need a permit, and there are often setbacks from property lines you need to adhere to. Don't skip this step; it can save you a lot of headaches down the road.

Sketching Out Your Design

Get a notebook and start sketching! Think about the layout. How will you access the loft? Will you use a ladder, stairs, or a pull-down staircase? How much headroom do you need in the loft? Consider shelving and storage options. Do you need specific areas for tools, gardening equipment, or seasonal items? Even rough sketches will help you visualize the finished product and make informed decisions about materials and construction.

Material Selection: Quality Counts!

This is where you’ll decide on the type of wood, roofing, and siding. Pressure-treated lumber is a great choice for the foundation and base framing because it resists rot and insect damage. For the walls and roof, you can use standard lumber, but consider using higher-quality boards for added durability. Think about roofing material â€" asphalt shingles are common and relatively inexpensive, but metal roofing is more durable (though pricier). Siding can be anything from vinyl to wood â€" it comes down to your budget and aesthetic preferences.

Phase 2: Construction â€" Building Your Shed

This is the fun (and maybe slightly messy) part! Remember safety first â€" wear appropriate safety gear like gloves, safety glasses, and sturdy work boots. If you're not comfortable with certain aspects of construction, don’t hesitate to ask for help from a more experienced builder, or even hire a professional for specific tasks.

Laying the Foundation

A strong foundation is crucial. This could be a concrete slab, concrete piers, or even a compacted gravel base. The choice depends on your soil conditions and local building codes. Make sure it's level! A level foundation is the key to a square and stable shed.

Framing the Walls and Roof

This involves cutting and assembling the lumber to create the walls and roof structure. Accurate measurements are essential here. Use a level and speed square to ensure everything is square and plumb. Don’t rush this stage; precision is key to a sturdy and long-lasting shed.

Sheathing and Roofing

Once the framing is complete, you'll add sheathing (plywood or OSB) to the walls and roof to provide a solid surface for your siding and roofing material. Then, install your chosen roofing material, making sure it's properly sealed to prevent leaks. Remember to install proper ventilation to prevent moisture buildup.

Installing the Siding

Now you get to add the finishing touch to the exterior. Install your siding, following the manufacturer's instructions. Take your time and make sure everything lines up neatly. This is where the shed starts to look like the finished product, which is super motivating!

Phase 3: Loft Construction â€" Adding Extra Space

The loft is what makes this shed special! It adds so much usable space. But remember, safety is paramount, especially when working at heights.

Building the Loft Floor

This involves framing a platform within the shed. Make sure the joists are properly spaced and supported to handle the weight. You might need to add additional support beams depending on the size of your loft. Use sturdy plywood for the flooring itself.

Adding Loft Access

Decide on your access method â€" a fixed staircase, a pull-down staircase, or a ladder. Each has its pros and cons regarding space and cost. A pull-down staircase saves space but can be less convenient. A fixed staircase is more comfortable but takes up more floor space.

Finishing the Loft

Once the floor is in place, you can add finishing touches to the loft like walls (if desired) and paint. This is a great opportunity to personalize the space. Think about lighting, too! A simple light fixture can make a big difference.

Phase 4: Finishing Touches â€" Adding the Details

The final touches are what truly make the shed your own.

Doors and Windows

Install doors and windows, ensuring they are properly sealed and weatherproof. You might even consider adding a window in the loft for extra light and ventilation.

Painting and Staining

Protect your shed with a coat of paint or stain. This not only improves its appearance but also protects the wood from the elements.

Electrical and Insulation (Optional)

Adding electricity and insulation can greatly increase the shed’s usability, especially the loft. Consult with a qualified electrician for electrical work, and consider insulation for both comfort and energy efficiency.

Commonly Asked Questions

  • How long does it take to build an 8x12 shed with a loft? This depends on your experience and the complexity of your design. Expect to spend several weekends, potentially more, depending on your pace.
  • How much does it cost to build an 8x12 shed with a loft? Costs vary widely depending on materials, location, and your level of DIY involvement. Budget at least a few thousand dollars.
  • Do I need a permit? Check with your local building department. Permits are often required for structures of a certain size.
  • Can I build this myself? Absolutely! With careful planning and a little research, most people with basic DIY skills can handle this project. Don't be afraid to ask for help when needed.
  • What are the best tools for this project? You'll need basic carpentry tools like a hammer, saw, drill, level, measuring tape, and safety glasses.
  • What kind of foundation do I need? The best foundation depends on your soil conditions and local building codes. Consult a professional if you're unsure.

Building an 8x12 shed with a loft is a rewarding experience. It's a great way to improve your property and add valuable storage space. With careful planning, attention to detail, and a little hard work, you’ll have a beautiful and functional shed in no time! Remember to always prioritize safety and don't hesitate to ask for help when needed. Happy building!

Read More..

How to Construct the Perfect 6x8 Shed Roof with Simple Plans

How to Construct the Perfect 6x8 Shed Roof with Simple Plans

Constructing the Perfect 6x8 Shed Roof: A Comprehensive Guide

This guide provides a detailed, step-by-step approach to constructing a robust and aesthetically pleasing 6x8 shed roof. Understanding the fundamentals of roof construction, including proper measurements, material selection, and assembly techniques, is crucial for a successful project. This guide assumes a basic understanding of carpentry and the use of common power tools. Safety precautions should always be prioritized throughout the construction process.

Phase 1: Planning and Preparation

Before commencing construction, meticulous planning is paramount. This phase involves determining the roof's design, acquiring necessary materials, and preparing the construction site.

1.1 Design Considerations

For a 6x8 shed, a simple gable roof is ideal due to its ease of construction and effective water runoff. The roof pitch, or slope, should be at least 4:12 (4 inches of rise for every 12 inches of run) to ensure adequate drainage. Steeper pitches are advisable in areas with heavy snowfall. Consider the aesthetic appeal of the roof in relation to the overall shed design. Sketching a preliminary design can help visualize the final product and identify potential challenges early on.

1.2 Material Selection

Choosing the right materials significantly impacts the roof's longevity and performance. The following are essential materials:

  • Roofing Sheathing: Oriented Strand Board (OSB) or plywood are common choices. Select sheathing that meets local building codes regarding thickness and structural integrity.
  • Roofing Underlayment: This acts as a secondary water barrier, protecting against leaks. Felt paper or synthetic underlayment are suitable options.
  • Roofing Material: Asphalt shingles are a cost-effective and readily available choice. Consider the climate and aesthetic preferences when selecting shingle type and color.
  • Rafters: Pressure-treated lumber is recommended for its resistance to rot and decay. The dimensions of the rafters will depend on the roof pitch and snow load requirements. Consult local building codes for specific requirements.
  • Ridge Board: A sturdy board forming the apex of the gable roof. Its dimensions should be compatible with the rafters.
  • Collar Ties/Purlins: These are optional but recommended for added stability, especially on longer spans. They connect opposing rafters, preventing outward thrust.
  • Fasteners: Use galvanized nails or screws to ensure resistance to rust and corrosion.
  • Flashing: Metal flashing is essential around chimneys, vents, and other roof penetrations to prevent water leakage.

1.3 Site Preparation

Ensure the shed's walls are properly constructed and level before starting roof construction. Clear the area around the shed to provide sufficient workspace. If necessary, erect scaffolding to facilitate safe and efficient work at heights.

Phase 2: Rafter Construction and Installation

This phase involves constructing and installing the rafters, which form the structural framework of the roof.

2.1 Rafter Calculations

Accurate rafter calculations are vital for a structurally sound roof. Use a rafter square or online calculator to determine the proper length and cuts for your chosen roof pitch. Factor in overhangs at the eaves and gable ends. Precise measurements prevent fitting issues and ensure the roof's stability.

2.2 Rafter Cutting and Assembly

Using the calculated measurements, cut the rafters to the appropriate lengths. The top ends of the rafters should be cut to fit snugly against the ridge board. The bottom ends (eaves) should be cut to create the desired overhang. Use a speed square and saw to ensure accurate cuts. Pre-drilling pilot holes before nailing or screwing prevents wood splitting.

2.3 Rafter Installation

Begin by installing the ridge board atop the shed walls. Then, carefully position and secure the rafters to the ridge board and the top plates of the shed walls using appropriate fasteners. Maintain consistent spacing between rafters, typically 16 or 24 inches on center. Temporarily brace the rafters to ensure stability during installation. Use a level to verify the rafters are plumb and aligned correctly.

2.4 Collar Tie/Purlin Installation (Optional)

If using collar ties or purlins, install them to connect opposing rafters roughly midway between the ridge and the eaves. These members enhance the structural integrity of the roof, especially important in areas prone to high winds or snow load.

Phase 3: Sheathing, Underlayment, and Roofing

This phase involves covering the rafter framework with sheathing, underlayment, and finally, the roofing material.

3.1 Sheathing Installation

Attach the OSB or plywood sheathing to the rafters, ensuring proper alignment and overlap between sheets. Use galvanized nails or screws to secure the sheathing. Stagger the joints of adjacent sheets for improved strength and water resistance. Ensure the sheathing is flush with the rafters to create a smooth surface for the underlayment.

3.2 Underlayment Installation

Roll out the roofing underlayment over the sheathing, overlapping the edges according to the manufacturer's instructions. This layer provides an extra barrier against water penetration. Secure the underlayment with roofing staples or nails. Pay close attention to sealing around any penetrations or irregularities.

3.3 Roofing Installation

Begin installing the roofing material at the bottom edge of the roof, working your way up. Follow the manufacturer's instructions for shingle layout and overlap. Maintain consistent alignment and spacing for a neat and professional finish. Use roofing nails to secure the shingles. Pay special attention to flashing around any chimneys, vents, or other roof penetrations. Ensure proper ventilation to prevent moisture buildup under the roofing.

Phase 4: Final Inspection and Cleanup

Once the roofing is complete, conduct a thorough inspection to identify and rectify any imperfections. Clean up any debris from the construction site, ensuring safety and a clean working environment.

This comprehensive guide provides a framework for constructing a 6x8 shed roof. Always refer to local building codes and consult with professionals if needed. Careful planning, accurate measurements, and diligent execution are key to a successful project. Remember safety precautions throughout the construction process are paramount.

Read More..

6x8 Shed Building Plans for Practical Storage and Organization

6x8 Shed Building Plans for Practical Storage and Organization

6x8 Shed Building Plans for Practical Storage and Organization

The construction of a 6x8 shed offers a practical solution for addressing storage needs on a modest scale. This compact structure provides ample space for organizing various items, ranging from garden tools and lawn equipment to seasonal decorations and recreational gear. Detailed planning and careful execution are essential to ensure the shed's longevity and functionality. This comprehensive guide outlines the critical considerations and steps involved in building a robust and well-organized 6x8 shed.

I. Planning and Design Considerations

Before commencing construction, meticulous planning is crucial. This stage encompasses determining the shed's location, material selection, design features, and necessary permits.

A. Site Selection and Preparation

Choosing the optimal location for your shed is paramount. Factors to consider include:

  • Accessibility: Ensure easy access for loading and unloading items.
  • Ground Conditions: Evaluate the ground's stability and drainage to prevent settling and water damage.
  • Sunlight and Shade: Consider the impact of sunlight and shade on the interior temperature and the potential need for ventilation.
  • Utilities: Assess proximity to electrical outlets or potential for future additions like lighting or power tools.
  • Local Regulations: Check for local building codes and zoning regulations regarding shed placement and size limitations.

Once the location is selected, site preparation involves clearing the area, leveling the ground, and potentially compacting the soil to create a stable foundation.

B. Material Selection

The choice of materials significantly impacts the shed's durability, cost, and aesthetic appeal. Common materials include:

  • Wood: Offers a versatile and relatively inexpensive option, providing aesthetic flexibility.
  • Metal: Provides superior durability and weather resistance but can be more expensive and may require specialized tools for construction.
  • Vinyl: Offers low maintenance and excellent weather resistance, but can be less aesthetically appealing and more expensive than wood.

Selecting high-quality materials is essential for a long-lasting shed. Consider treated lumber for wood construction to enhance resistance to rot and insect infestation. For metal sheds, consider gauge thickness to ensure structural integrity.

C. Design Features and Functionality

Careful consideration of design features enhances the shed's functionality and organization:

  • Door Placement and Size: Optimizing door placement ensures easy access and efficient use of interior space. A double door may be preferable for larger items.
  • Window Placement: Windows provide natural light and ventilation. Consider the placement and size to maximize benefits.
  • Shelving and Workbench: Incorporate shelving and a workbench to improve organization and provide a workspace.
  • Flooring: Consider concrete, plywood, or composite decking for durable and easy-to-clean flooring.
  • Ventilation: Adequate ventilation is crucial to prevent moisture buildup and mildew. Include vents in the roof and walls.

II. Construction Process

The construction process involves several distinct stages, each requiring careful attention to detail.

A. Foundation Construction

A solid foundation is critical for the shed's stability. Options include:

  • Concrete Slab: Provides a level, durable base, ideal for heavier sheds.
  • Gravel Base: A more economical option suitable for lighter sheds. Requires careful leveling and compaction.
  • Pier and Beam: Elevates the shed off the ground, improving drainage and preventing moisture damage.

The chosen foundation method must align with local building codes and the weight of the completed shed.

B. Frame Construction

The frame construction involves assembling the walls, roof trusses, and door/window frames. Accuracy in measurements and precise joining techniques are crucial for structural integrity. Detailed plans and diagrams are essential at this stage. Using appropriate fasteners and ensuring squareness are crucial.

C. Siding and Roofing

Siding and roofing complete the shed's exterior. The chosen material’s installation process will vary. Ensure proper sealing and flashing to prevent water intrusion.

D. Interior Finishing

Interior finishing involves installing shelving, a workbench (if included in the design), and flooring. Careful consideration of organization is crucial at this stage. Consider using waterproof materials in areas prone to moisture.

III. Organization and Storage Solutions

Maximizing the shed's storage capacity and organization is crucial for its practical use. Several strategies enhance functionality:

A. Shelving Systems

Installing adjustable shelving maximizes vertical space and accommodates items of varying sizes. Consider materials like wood, metal, or plastic depending on the items stored.

B. Wall-Mounted Storage

Utilize wall space with pegboards, hooks, and racks to store tools and smaller items, keeping them readily accessible and preventing clutter.

C. Bin and Container Systems

Using labeled bins and containers for smaller items keeps them organized and easily identifiable. This is especially helpful for seasonal items or parts.

D. Vertical Storage Solutions

Utilize vertical space efficiently with tall shelves, stackable containers, or hanging organizers. This maximizes the use of the limited space within a 6x8 shed.

IV. Safety Precautions

Safety should be paramount throughout the entire building process. Always:

  • Wear appropriate safety gear: safety glasses, gloves, and hearing protection.
  • Use proper tools and techniques: Follow manufacturer instructions and safe operating procedures for all power tools.
  • Work with a partner: For lifting heavy materials or performing tasks requiring assistance.
  • Inspect regularly: Regularly inspect the structure for any signs of damage or wear.

By carefully planning, selecting appropriate materials, and following these construction steps, you can create a durable and well-organized 6x8 shed that provides years of practical storage and enhances the functionality of your property.

Read More..

Affordable 6x8 Firewood Shed Plans for Storing Your Wood

Affordable 6x8 Firewood Shed Plans for Storing Your Wood

Affordable 6x8 Firewood Shed Plans for Storing Your Wood

This comprehensive guide provides detailed plans for constructing an economical yet durable 6x8 firewood shed, perfect for storing your winter's fuel supply. The design prioritizes affordability and ease of construction, utilizing readily available materials and straightforward techniques. Detailed material lists, step-by-step instructions, and considerations for various climates are included to ensure a successful project.

I. Design Considerations and Material Selection

Before embarking on construction, careful planning is essential. The 6x8 footprint offers ample storage capacity for a substantial amount of firewood, while remaining manageable for DIY construction. This design prioritizes simplicity and cost-effectiveness without compromising structural integrity.

A. Foundation Options

The foundation choice significantly impacts both cost and longevity. Several options exist, each with its own advantages and disadvantages:

  • Gravel Base: This is the most affordable option, requiring simply leveling the ground and creating a 4-6 inch layer of compacted gravel. It offers good drainage but lacks the permanence of other options.
  • Concrete Slab: A poured concrete slab provides a robust and level base, ideal for heavier loads and prolonged use. However, it’s more expensive and requires more labor.
  • Pressure-Treated Lumber Skids: A simple and cost-effective solution involves creating a platform using pressure-treated lumber. This raises the shed off the ground, improving ventilation and preventing rot. Ensure proper spacing for air circulation.

For this plan, we will focus on the pressure-treated lumber skid foundation due to its balance of cost-effectiveness and durability.

B. Framing Materials

The framing material choice directly impacts the shed’s strength and longevity. Pressure-treated lumber is recommended for its resistance to rot and decay, ensuring the shed's structural integrity even in humid environments. Consider using:

  • 4x4 Pressure-Treated Posts: For corner posts and support beams.
  • 2x4 Pressure-Treated Lumber: For wall studs, rafters, and bracing.
  • 2x6 Pressure-Treated Lumber: For the floor joists (if using a platform foundation) or as a more robust alternative for wall studs.

C. Roofing Material

The roofing material choice influences both cost and aesthetics. Cost-effective options include:

  • Corrugated Metal Roofing: Durable, long-lasting, and relatively inexpensive. It's also weather-resistant and requires minimal maintenance.
  • Asphalt Shingles: A more traditional look, but generally more expensive than metal roofing and requires more careful installation.

For this budget-conscious design, corrugated metal roofing is the recommended choice.

D. Siding Material

Siding materials contribute to the shed's aesthetic appeal and weather protection. Affordable and practical choices include:

  • Plywood Siding: Relatively inexpensive and readily available, providing good protection when properly treated and sealed.
  • Shiplap Siding: Offers a more rustic and visually appealing finish, though it is typically more costly than plywood.

For this plan, pressure-treated plywood siding is recommended for its affordability and durability.

II. Step-by-Step Construction Guide

This section outlines the step-by-step process for constructing the 6x8 firewood shed. Detailed measurements and diagrams are crucial and should be consulted alongside these instructions. (Note: Diagrams and detailed measurements would be included in a full set of plans, which are beyond the scope of this text.)

A. Foundation Construction

  1. Level the ground where the shed will be located.
  2. Construct the pressure-treated lumber skid base: This involves creating a rectangular frame using 4x4 posts and 2x6 lumber for the platform.
  3. Ensure the base is level and firmly positioned on the ground.

B. Framing the Walls

  1. Cut and assemble the wall frames using 2x4 pressure-treated lumber.
  2. Ensure proper spacing for insulation (optional) and sheathing.
  3. Erect the wall frames onto the foundation, securing them firmly using appropriate fasteners.

C. Roofing Construction

  1. Construct the roof trusses or rafters using 2x4 lumber.
  2. Attach the trusses/rafters to the top plates of the wall frames.
  3. Install the corrugated metal roofing, ensuring proper overlap and sealing.

D. Siding Installation

  1. Install the pressure-treated plywood siding onto the wall frames, ensuring proper overlapping and sealing.
  2. Use appropriate fasteners and weatherproofing materials.

E. Door and Window Installation (Optional)

If desired, a door can be added for easier access to the firewood. A simple, hinged door can be constructed using pressure-treated lumber and appropriate hardware. Windows are optional but can improve ventilation and light within the shed.

III. Additional Considerations

Several factors influence the longevity and effectiveness of your firewood shed:

  • Ventilation: Proper ventilation is critical to prevent rot and mildew. Ensure sufficient airflow by leaving gaps between the wood and the walls.
  • Weather Protection: Choosing appropriate materials and ensuring proper sealing is crucial for protecting the firewood from moisture.
  • Pest Control: Consider implementing measures to prevent pest infestations, such as using pest-resistant lumber or installing mesh screens.
  • Local Building Codes: Check with your local building department to ensure compliance with any relevant regulations.

IV. Conclusion

Constructing an affordable 6x8 firewood shed is a feasible DIY project, offering a practical solution for storing your firewood efficiently and effectively. By carefully following these plans and considering the factors outlined above, you can create a durable and cost-effective storage solution that will serve you for years to come. Remember to always prioritize safety and use appropriate safety equipment during construction.

Disclaimer: This guide provides general instructions. Always consult with qualified professionals for specific advice and to ensure compliance with local building codes. Improper construction can lead to structural failure and safety hazards. The detailed plans with exact measurements and diagrams are not included here and should be sourced separately for a safe and successful project.

Read More..

8x12 Shed with Loft Plans: Everything You Need to Build the Perfect Shed

8x12 Shed with Loft Plans: Everything You Need to Build the Perfect Shed

8x12 Shed with Loft Plans: Everything You Need to Build the Perfect Shed

Dreaming of a spacious and organized storage solution? An 8x12 shed with a loft offers the perfect blend of ground-level storage and valuable overhead space. This comprehensive guide provides you with everything you need to design, plan, and build your ideal shed, transforming your outdoor space into a haven of functionality and style. Forget cramped, disorganized sheds; let's build something extraordinary!

Planning Your 8x12 Shed with Loft

Before you even pick up a hammer, meticulous planning is key. This phase sets the foundation for a successful build. Start by defining your needs. What will you store in the shed? How much vertical space do you require in the loft? Consider the weight of your belongingsâ€"this will directly impact the shed's structural requirements. Next, examine your chosen location. Check local building codes and zoning regulations. You'll need to assess site preparation, considering factors like leveling the ground and ensuring adequate drainage. Finally, sketch a preliminary design, factoring in both the ground floor and the loft area. This detailed plan will guide your material selection and construction process.

Choosing the Right Materials

Selecting high-quality materials significantly impacts the longevity and durability of your shed. Opt for pressure-treated lumber for the foundation and framing to resist rot and insect damage. Consider using composite decking for the floor and roof, offering exceptional weather resistance and minimal maintenance. For siding, explore options like vinyl, metal, or even reclaimed wood, depending on your aesthetic preference and budget. Remember to factor in the roofing materials; asphalt shingles provide a cost-effective and reliable choice, while metal roofing offers superior longevity and weather protection. Choosing the right materials up front saves time, effort, and potential headaches later in the project.

Detailed Construction Steps: Building Your Dream Shed

With your plans finalized and materials gathered, it's time to build! The process begins with preparing the foundation. This might involve creating a concrete slab, laying down gravel, or building a wooden frame. Ensure your base is perfectly level to prevent structural issues later. Next, erect the walls, carefully following your blueprint and using appropriate fastening techniques. Remember to incorporate proper bracing for strength and stability. Installing the roof structure is crucial; this involves building trusses or rafters and ensuring they are securely attached to the walls. Proper roof installation prevents leaks and provides overall structural integrity. Once the shell is complete, focus on sheathing, roofing, and exterior finishing.

Creating the Loft: Maximizing Vertical Space

Building the loft adds another dimension to your storage potential. Start by constructing a sturdy platform using pressure-treated lumber. Ensure adequate headroom and consider adding railings for safety. Use strong, evenly spaced supports to handle the weight of stored items. Remember to incorporate a staircase or ladder for easy access. Think about ventilation in the loft to prevent moisture build-up. A well-constructed loft doubles your usable space, offering a fantastic solution for seasonal items, tools, or even a small workspace.

Essential Tools and Equipment

Building an 8x12 shed with a loft requires a range of tools. Essential tools include a measuring tape, level, saw (circular saw and hand saw), hammer, drill, screwdriver, and various fasteners. You'll also need post hole diggers (if building a post-and-beam foundation), a shovel, and potentially a concrete mixer. Consider renting larger power tools like a nail gun or a post hole digger if you don't own them, saving you money on purchasing equipment you may only use once. Remember safety gear like safety glasses, work gloves, and hearing protection are crucial throughout the entire building process.

Finishing Touches and Customization

Once the structure is complete, personalize your shed! Consider adding windows for natural light and ventilation. Install a sturdy door with a reliable locking mechanism. Paint or stain the exterior to protect the wood and enhance the aesthetics. Inside, you can add shelving units, cabinets, or hooks for optimal organization. Consider adding electrical outlets and lighting if needed. The finishing touches transform a functional structure into a beautiful and highly organized addition to your property. Remember to document your progress with photos and notes.

Safety First!

Throughout the entire building process, prioritize safety. Always follow safe operating procedures for all power tools. Wear appropriate safety gear, and never work alone on tasks that require lifting or maneuvering heavy materials. If you're unsure about any aspect of the construction, consult a professional builder. A safe and well-planned project ensures a successful outcome and protects you from potential injury.

Building an 8x12 shed with a loft is a rewarding project. By following these detailed plans and prioritizing safety, you’ll create a valuable addition to your property, increasing storage space and enhancing your outdoor living area. Now get started and enjoy the process!

Read More..

Free 6x8 Shed Plans PDF for Gardeners and Outdoor Enthusiasts

Free 6x8 Shed Plans PDF for Gardeners and Outdoor Enthusiasts

Free 6x8 Shed Plans PDF for Gardeners and Outdoor Enthusiasts

This comprehensive guide provides detailed information on acquiring and utilizing free 6x8 shed plans in PDF format, specifically designed for gardeners and outdoor enthusiasts. A 6x8 shed offers a practical and versatile storage solution for various gardening tools, equipment, and outdoor recreational items. This document will thoroughly explore the benefits of such a structure, guide you through the process of finding reliable free plans, and offer valuable tips for construction and customization.

The Allure of a 6x8 Shed

A 6x8 foot shed represents an optimal balance between size and functionality. Its compact dimensions make it suitable for even smaller gardens or yards, while still providing ample storage space. The manageable size also simplifies the construction process, making it a feasible DIY project for individuals with moderate carpentry skills. This size is particularly beneficial for:

  • Storage of Gardening Tools and Equipment: Shovels, rakes, hoes, wheelbarrows, and other bulky gardening tools can be neatly organized within a 6x8 shed, protecting them from the elements and extending their lifespan.
  • Safekeeping of Potting Supplies: Bags of soil, fertilizers, potting mixes, and seeds find a secure and dry home, preserving their quality and preventing unwanted pest infestations.
  • Housing Outdoor Recreational Gear: From bicycles and sports equipment to camping gear and outdoor furniture, a 6x8 shed can accommodate a range of items, keeping them organized and protected.
  • Workspace for Smaller Projects: The space can be adapted to serve as a small potting bench area or workshop for smaller DIY projects, allowing for year-round gardening preparation.
  • Additional Storage for Household Items: It can also provide additional storage for items not readily stored within the main house, freeing up valuable indoor space.

Locating Reliable Free 6x8 Shed Plans in PDF Format

Finding trustworthy and comprehensive free plans is crucial for a successful DIY shed project. While many websites offer free plans, it's essential to verify their reliability and accuracy before commencing construction. Here's a strategic approach:

Utilizing Reputable Online Resources

Numerous websites dedicated to DIY projects and woodworking offer free shed plans. However, prioritize sites with established reputations and positive user reviews. Look for websites that provide detailed diagrams, comprehensive material lists, step-by-step instructions, and user feedback. Cross-referencing information from multiple sources is always advisable.

Scrutinizing Plan Content

Before downloading any plans, carefully review their content. Ensure the plans include:

  • Detailed Dimensions and Drawings: Accurate measurements are essential for a structurally sound shed.
  • Comprehensive Material List: A complete list of necessary materials, including quantities and specifications, prevents delays and ensures the project progresses smoothly.
  • Step-by-Step Instructions: Clear and concise instructions, potentially including photographs or illustrations, are vital for easy comprehension and successful construction.
  • Cutting Diagrams: Accurate cutting diagrams for the wood components are crucial for precise construction.
  • Assembly Instructions: Step-by-step guidance on assembling the various components of the shed.
  • Foundation Recommendations: Guidance on choosing an appropriate foundation for the shed, considering local soil conditions and climate.

Considering User Reviews and Feedback

Before committing to a particular set of plans, examine user reviews and feedback. This provides valuable insights into the accuracy, clarity, and overall effectiveness of the plans. Positive reviews indicate a higher probability of a successful project.

Essential Considerations Before Construction

Prior to initiating the construction process, several crucial factors need careful consideration:

Local Building Codes and Permits

Check with your local authorities to determine if building permits are required for a 6x8 shed. Building codes vary by location, and understanding the regulations is critical to avoid potential legal issues.

Site Selection and Preparation

Choose a level and appropriately sized area for your shed. Clear the site of any debris, vegetation, and obstructions. Consider drainage and potential water runoff.

Material Selection and Procurement

Use high-quality pressure-treated lumber for the shed's frame and flooring to ensure longevity and resistance to decay. Source all necessary materials in advance to avoid delays during construction.

Tools and Equipment

Ensure you have all the necessary tools and equipment, including measuring tools, saws, drills, hammers, screws, and other relevant hardware. Renting specialized tools might be more cost-effective than purchasing them.

Customization and Enhancements

While free plans provide a solid foundation, consider adding personal touches to customize your shed:

  • Windows and Ventilation: Adding windows and ventilation improves air circulation and reduces humidity, protecting stored items from moisture damage.
  • Shelving and Storage Solutions: Incorporating shelving and other storage solutions maximizes space utilization and provides organized storage.
  • Exterior Finishing: Painting or staining the shed not only enhances aesthetics but also protects the wood from the elements.
  • Locking Mechanism: A secure locking mechanism is crucial to protect the contents of your shed from theft or unauthorized access.
  • Workbenches: Integrating workbenches can transform the shed into a practical workspace for potting, repairs, or other gardening-related tasks.

By carefully following these guidelines, you can successfully utilize free 6x8 shed plans to construct a durable and functional storage solution, tailored to your specific needs as a gardener and outdoor enthusiast. Remember, thorough planning, meticulous execution, and attention to detail are key to a successful DIY project.

Read More..
 
Bobby Crouser - Powered By Blogger