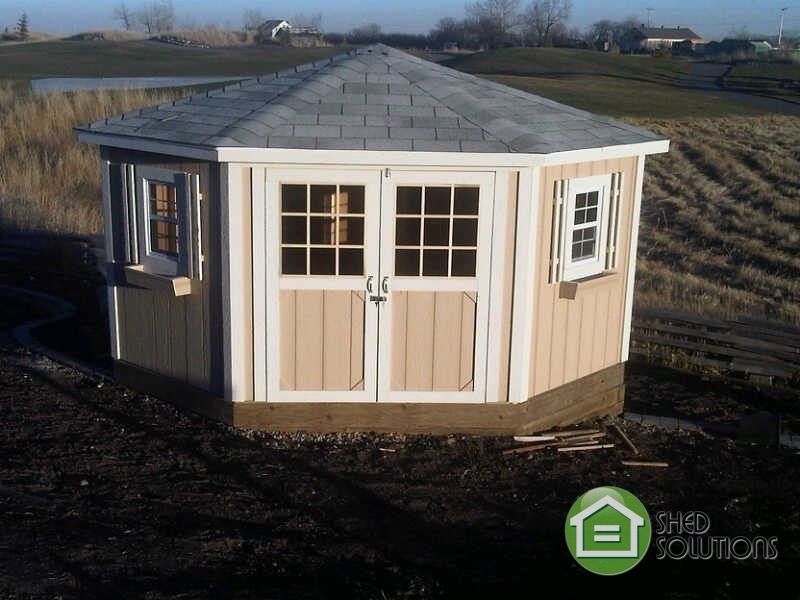
If you have ever searched for reliable diy shed plans 10x12 to create your own backyard sanctuary, you likely know how confusing and expensive pre-built options can be.
Building a garden shed yourself is one of the most rewarding ways to customize space while keeping costs down, but it requires careful planning from the very beginning.
In this article:
- Choosing The Right Site And Ground Preparation For Sheds
- Calculating Material Needs To Minimize Waste And Costs
- Efficient Framing Layouts That Save Time And Money
- Sourcing Budget Friendly Materials Without Compromising Strength
- Step By Step Assembly Tips For Beginners With Limited Tools
- Frequently Asked Questions
- Final Thoughts
Choosing The Right Site And Ground Preparation For Sheds
Before you cut a single piece of lumber, select a location that offers a flat surface to prevent your structure from sitting unevenly.
Selecting A Level Location
Avoid planting your shed on soft soil or near large trees where roots might destabilize the foundation over time. Use a long straight board and a level to check for dips, as even small slopes can cause water pooling and structural stress. If you must build on slightly uneven ground, plan to use thicker skids that bridge low spots rather than trying to grade the soil extensively.
Ensure there is enough clearance around the perimeter so you have room to work when assembling walls or installing roofing materials. This space also helps with natural drainage and provides access for future maintenance tasks like painting or cleaning gutters.
Preparing The Ground
Clear the chosen area of grass, rocks, and debris by hand raking or using a shovel to create a clean working surface. Remove any large stones that could puncture your flooring or cause the base frame to tilt during construction. If you plan to use gravel for drainage rather than a concrete slab, spread a layer about 2 inches (5 cm) deep across the site.
Compacting this gravel layer with a hand tamper creates a stable base that supports the weight of your shed without shifting. Proper preparation here is critical because fixing an uneven foundation after you build costs significantly more than doing it right initially. Always verify local zoning laws regarding setbacks from property lines before finalizing your spot.
Once the ground is level and compacted, you can begin laying down pressure-treated skids or constructing a concrete pad to elevate your shed above moisture levels. This elevation protects the wood floor joists from rot caused by ground contact water over time.
Calculating Material Needs To Minimize Waste And Costs
Accurate measurement is the single most effective way to reduce costs on a DIY shed plans 10x12 project, as buying extra lumber often leads to wasted money and storage headaches.
Determine Wall Lumber Quantities
- Top Plates: A standard 8-foot (2.4 m) long wall requires two 2x4s running the full length of the shed, so calculate for four 10-foot (3 m) pieces to allow for cutting corners.
- Bottom Plates: Use pressure-treated 2x6s or 2x8s on the ground level to resist rot; you will need two pieces matching your wall length plus extra for gable ends if applicable.
- Studs and Headers: Calculate studs at 16 inches (40 cm) on center, which means roughly thirty-five 8-foot (2.4 m) studs per straight wall section to avoid complex cutting angles.
This precise count prevents overbuying materials that might be cut too short or left unused during the build process.
Craft Frame Material Calculations
- Floor Joists: For a 10x12 (3 m x 3.6 m) footprint, you typically need four to six joists spaced at 16 inches (40 cm), requiring three or four 8-foot (2.4 m) pieces depending on your layout.
- Roof Rafters: Determine the rafter length based on your roof pitch; for a simple gable design, you usually need two pieces per side plus trimmers to support the top plate corners.
- Sheathing: 3/4-inch exterior plywood covers the entire surface area of walls and roof, so divide total square footage by the 192-square-foot (17.8 sq m) yield of a standard sheet to find your count.
Miscounting these components often results in purchasing an extra bundle of siding or roofing felt simply because you forgot one small section.
Utilize Leftovers for Trim and Fittings
- Scrap Wood: Save offcuts from cutting studs to use as shelf supports, door frames, or vent covers rather than buying new stock later.
- Standard Sizes: Select dimensions that match your lumber store's standard lengths, such as 8-foot (2.4 m) boards, to minimize the need for expensive custom cuts.
This strategic planning ensures every dollar spent on budget shed construction contributes directly to the finished structure rather than being lost in disposal fees.
Efficient Framing Layouts That Save Time And Money
When you start a budget shed construction project, your framing strategy directly impacts both material costs and labor hours. Using standard 16-inch on-center spacing for studs is the industry norm because it allows materials like 2x4 lumber to be cut from standard lengths with minimal waste. This spacing ensures that floor joists align perfectly with wall plates, creating a solid grid for attaching your subfloor without needing complex calculations or extra hardware.
Optimizing Wall Plates And Studs
For walls 8 feet tall, vertical 2x4 studs can be cut to exactly 96 inches, which is the full length of a standard board. This eliminates the need for shortening boards or using metal connectors at every corner joint. Place these studs directly between floor joists and roof rafters so that nails pass through three layers of wood simultaneously. This creates a rigid connection point without requiring additional blocking or sistering of boards to increase stability.
Simplified Beam Placement
In an efficient framing layout, horizontal beams like the top plate should align with your roof ridge line and floor joists. If you are building a garden shed with a simple gable or shed roof, keep the ridge beam centered over the main support posts to distribute weight evenly. This alignment reduces the amount of trim board needed for corners and simplifies the installation of siding panels later.
- Standard Spacing - Use 16-inch centers for all studs and joists to match lumber dimensions.
- Cut Lengths - Cut vertical posts exactly 96 inches long for an 8-foot wall height.
- Alignment Points - Align top plates with roof rafters for maximum structural integrity.
By sticking to these standard dimensions, you avoid paying a premium for custom-cut lumber and reduce the time spent measuring and cutting on-site. A well-planned frame also means fewer gaps between wall sections, which improves insulation performance if you decide to add it later. Focus on getting the corners square before driving nails, as this makes framing subsequent walls significantly faster and more accurate.
Tips for Beginners
- Square Your Corners - Use the 3-4-5 triangle method to ensure corners are perfectly perpendicular before securing studs.
- Use a Speed Square - Mark cut lines with a speed square instead of a ruler for faster, more accurate cuts on your circular saw.
Remember that efficiency in framing reduces the overall project timeline. When you finish the frame quickly and correctly, you can move immediately to roofing and siding without worrying about structural repairs down the road.
Sourcing Budget Friendly Materials Without Compromising Strength
Starting your budget shed construction project requires smart shopping rather than just finding the lowest price tag on every item.
Smart Lumber Sourcing
- Pressure-Treated Skids - Use these for the base to prevent rot, but buy them in bulk or from a local sawmill for better rates than retail lumber yards.
- Pine Studs - Southern yellow pine is affordable and strong enough for standard shed walls when properly sized. Avoid expensive hardwoods like oak unless you have a specific aesthetic need.
Buying lumber in full lengths from the supplier's stockpile often costs less per board foot than purchasing pre-cut dimensional wood, saving you significant money on waste reduction.
Cheap Materials For Sheds
- Cedar Siding - While cedar is durable, it can be expensive. Consider using a mix of cedar for the upper trim and pressure-treated pine or composite panels for the main wall area to balance cost with appearance.
- Exterior Plywood - 3/4-inch exterior grade plywood is stronger than standard OSB and resists warping better in humid conditions, making it a wise investment even on a tight budget.
If you are open to alternatives, check local salvage yards for discarded commercial siding or roofing shingles that can be cleaned and reused for a fraction of the cost.
Affordable Hardware Choices
- Fasteners - Always use galvanized or zinc-plated exterior fasteners. Standard drywall screws will rust quickly outdoors, leading to structural failure within a few years.
- Hinges and Latches - Purchase heavy-duty galvanized hinges rated for the door size. A cheap plastic latch often breaks under the weight of an empty tool box or wet winter gear.
When sourcing your materials, prioritize structural integrity over cosmetic perfection to ensure the build lasts. Using slightly rougher lumber that you plane and sand yourself is cheaper than buying premium finished wood.
Safety Note: Always wear eye protection when handling raw lumber, as sap splinters can be sharp and difficult to remove.
Step By Step Assembly Tips For Beginners With Limited Tools
Assembling a small garden structure with basic tools requires patience and methodical planning rather than advanced carpentry skills. Focus on building sturdy corners first, as these anchor points determine the overall squareness of your build. Use a speed square to mark plumb lines on every stud before cutting, ensuring vertical alignment throughout the project.
Laying Out And Cutting The Floor
Start by laying out the pressure-treated 4x4 skids directly on the prepared ground using chalk lines for precision. Measure and cut each piece to length with a circular saw, double-checking dimensions twice before making any final cuts. Ensure the corners form perfect 90-degree angles, as errors here will make fitting walls difficult later.
Constructing The Wall Frames
Erect the wall frames by attaching floor joists to the studs using galvanized exterior fasteners for weather resistance. Keep studs spaced consistently at 16 inches on center to match standard panel dimensions and minimize cutting waste. Use a level frequently during assembly to ensure walls rise straight without leaning.
Raising The Walls
Lift each framed wall section onto the skids with a helper, as these frames can become heavy when filled with studs. Temporarily brace corners with 2x4 boards while installing roof trusses or sheathing to prevent shifting during construction. Do not rely on nails alone for stability; use screws where possible to reduce the chance of fasteners loosening over time.
Installing Roofing And Siding
Lay roofing felt over the plywood sheathing before installing shingles or metal panels to create a primary moisture barrier. Apply siding boards horizontally, staggering end joints between rows for both strength and visual appeal. Fill all gaps at corners and edges with exterior-grade caulk to prevent water infiltration.
Finalizing The Structure
Install the door frame last by measuring twice and marking once, ensuring it fits squarely within the rough opening. Add trim around windows and doors for a finished look that also protects against drafts. Verify all connections are tight before applying paint or stain to ensure long-lasting durability.
Frequently Asked Questions
What is the average cost to build a 10x12 shed yourself?
The average cost to build a 10x12 diy shed plans 10x12 ranges from $1,500 to $3,500 depending on material choices and foundation type. Budget options using pressure-treated lumber can reach under $2,000, while higher-end siding or insulation increases the price. Always check local permits before starting your budget shed construction project.
Can I use recycled lumber for my garden shed foundation?
You should avoid using recycled lumber for a shed foundation because it often contains hidden rot, termites, or chemical preservatives like CCA that can leach into the soil. Building your 10x12 garden shed on pressure-treated skids ensures long-term stability and protects the structure from ground moisture. Always check local codes before starting any construction project to ensure safety and compliance.
How do I save money on roofing materials for a small shed?
Selecting standard 3-tab asphalt shingles instead of architectural or metal options significantly lowers material costs without sacrificing durability. Utilizing leftover scraps from neighboring projects can further reduce expenses, as these pieces fit well into eaves and gables where full sheets are unnecessary. Always purchase materials in bulk when possible to secure better pricing per square foot.
Final Thoughts
Successful construction begins with careful site selection and ground preparation to ensure a stable base for your project.
Cost Reduction Strategies
- Accurate Material Calculation - Determine exact quantities needed to minimize waste and purchasing excess lumber.
- Efficient Framing Layouts - Plan your efficient framing layout to reduce cutting time and material overlap during assembly.
- Budget-Friendly Sourcing - Source budget friendly materials by comparing local suppliers without compromising structural strength.
Adhering to these principles allows you to build a durable garden shed using diy shed plans 10x12 while maintaining control over your overall expenses.